
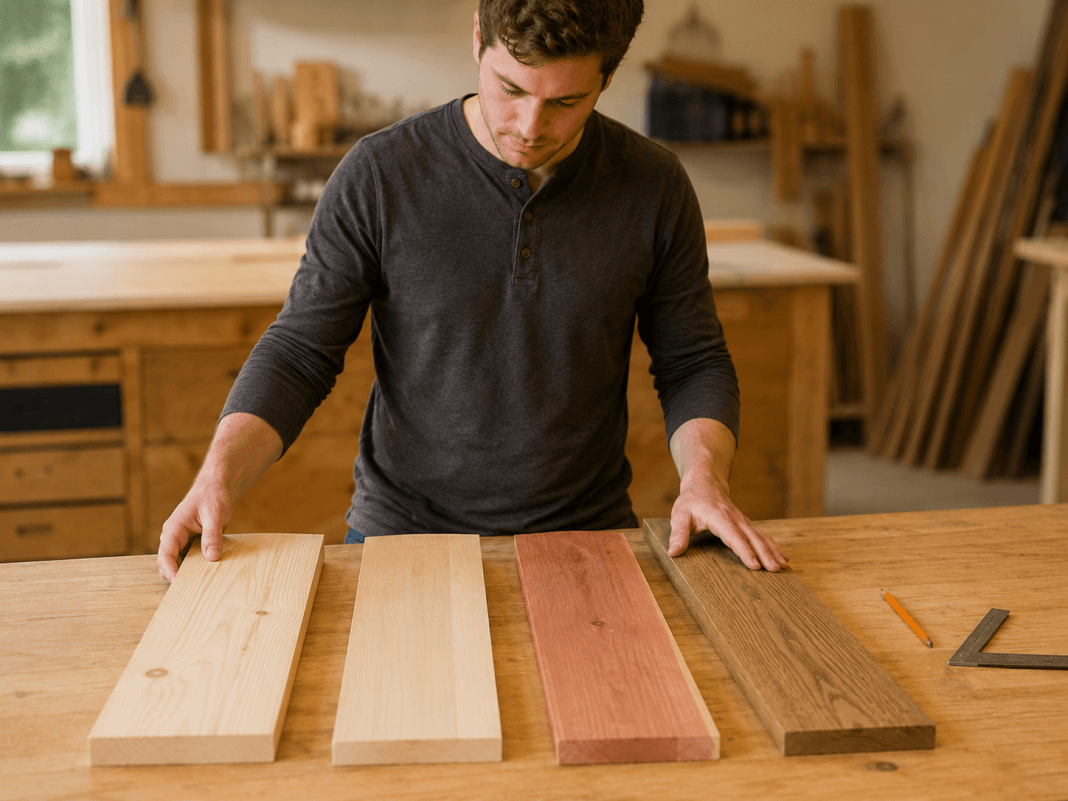
Choosing lumber can feel confusing when you are planning your first few woodworking projects. A typical home improvement store may carry several species, grades, thicknesses, and board types, and the differences are not always obvious to a beginner.
The good news is that you do not need to understand every type of lumber before you begin. Learning a few basic principles will help you choose wood that is affordable, workable, and appropriate for the project you want to build.

How to Choose the Right Wood for Beginner Woodworking Projects
The right wood depends on three main factors: what you are building, where the finished project will be used, and how comfortable you are working with different materials.
A small indoor shelf does not need the same lumber as an outdoor planter. A painted storage crate can be built from inexpensive boards, while a natural-finish table may benefit from wood with more attractive grain.
Before buying anything, ask yourself:
- Will the project be used indoors or outdoors?
- Does it need to support significant weight?
- Will the finished piece be painted, stained, or left natural?
- Does the plan specify a particular board thickness?
- Are the required tools appropriate for the wood?
These questions narrow your choices and help prevent buying lumber that is unnecessarily expensive or difficult to work with.
Start With Beginner-Friendly Wood
Some wood species are easier for beginners because they are widely available, relatively affordable, and simple to cut, drill, sand, and fasten.
Pine
Pine is one of the most practical choices for early woodworking projects. It is lightweight, easy to cut, and commonly sold in standard board sizes.
It works especially well for:
- Small shelves
- Tool totes
- Storage crates
- Simple benches
- Indoor plant stands
- Practice projects
Pine is soft, so it can dent more easily than hardwood. However, that softness also makes it forgiving when you are learning how to saw, drill, and sand accurately.
Poplar
Poplar is another useful beginner material. It is typically smoother and more uniform than inexpensive pine, making it a good option for painted furniture and decorative projects.
Poplar is often chosen for:
- Painted shelves
- Small tables
- Cabinet components
- Frames
- Decorative home projects
Its grain is usually less dramatic than premium hardwood, but it machines cleanly and accepts paint well.
Cedar
Cedar is commonly used for outdoor projects because it handles moisture better than many untreated indoor woods. It is also lightweight and generally easy to work with.
Beginner cedar projects may include:
- Planter boxes
- Small garden stands
- Outdoor shelves
- Birdhouses
- Simple patio accessories
Cedar can split if screws are driven too close to the edge, so drilling pilot holes is especially helpful.
Understand Softwood and Hardwood
The terms softwood and hardwood refer primarily to the type of tree the lumber comes from, not simply how hard the board feels.
Common softwoods include pine, cedar, fir, and spruce. They are often affordable and easy to find, which makes them practical for beginner projects.
Common hardwoods include oak, maple, walnut, cherry, and poplar. Many hardwoods are denser, heavier, and more expensive than softwoods. They can produce attractive and durable projects, but they may also require sharper tools and more careful cutting.
Beginners do not need to avoid hardwood completely. A small poplar or oak project can be a useful learning experience. However, inexpensive softwood is usually a better material for practicing new techniques.

Choose Lumber That Matches the Project
A project plan should identify the board dimensions and approximate lengths required. Follow those specifications closely, especially when the design depends on several pieces fitting together.
Indoor Utility Projects
For basic indoor projects such as crates, organizers, simple shelves, and tool storage, pine is often sufficient. These projects usually prioritize function, affordability, and ease of construction.
Painted Projects
Poplar, smooth pine, and quality plywood are good candidates for painted projects. Paint hides differences in wood color and allows you to focus on smooth surfaces and clean assembly.
Natural-Finish Projects
When you plan to use a clear finish or stain, pay closer attention to grain, board color, knots, and visible defects. Pine can still look attractive, but boards should be selected carefully because stain may highlight blotches or uneven grain.
Outdoor Projects
Outdoor projects need lumber that can tolerate moisture and changing weather conditions. Cedar and properly rated pressure-treated lumber are common options.
Pressure-treated lumber may contain more moisture when purchased, so it can feel heavy and may need time to dry before painting or staining. Always follow the manufacturer’s handling and finishing instructions.
Inspect Every Board Before Buying It
Even lumber of the same species and size can vary significantly from one board to another. Never assume every board in a stack is equally suitable.
Inspect each board for the following problems:
Warping
Look down the length of the board from one end. A board that curves sideways, twists, cups across its width, or bows along its length can make accurate assembly difficult.
Slight movement may be manageable for a small project, but beginners will usually get better results from the straightest boards available.
Large or Loose Knots
Small, solid knots may add character, but large or loose knots can weaken a board and interfere with cutting or fastening.
Avoid placing important joints, screws, or narrow cuts directly through questionable knots.
Cracks and Splits
Check both ends and faces of the board for cracks. A small split near the end may be removable if you have extra length, but deeper cracks can make the board unsuitable.
Damaged Edges
Boards with crushed corners, missing edges, or deep dents may require more trimming than your project allows. Choose clean edges when the board will remain visible.
Excessive Moisture
Very wet boards may shrink, twist, or crack as they dry. This is especially common with some outdoor lumber. Avoid obviously soaked boards unless the project and schedule allow proper drying time.
Know the Difference Between Nominal and Actual Dimensions
A board sold as a 1 × 4 is not actually one inch thick and four inches wide. After drying and surfacing, its actual dimensions are usually smaller.
Common examples include:
- A 1 × 2 is commonly about 3/4 inch by 1 1/2 inches.
- A 1 × 4 is commonly about 3/4 inch by 3 1/2 inches.
- A 1 × 6 is commonly about 3/4 inch by 5 1/2 inches.
- A 2 × 4 is commonly about 1 1/2 inches by 3 1/2 inches.
Always measure the lumber or confirm its actual dimensions before finalizing cuts. This is particularly important when boards must fit inside an opening or align with other components.
Careful material planning is one part of learning how to plan your first woodworking project before making the first cut.
Consider Plywood for Panels and Flat Surfaces
Plywood is made from thin layers of wood bonded together. It is commonly used when a project needs a wide, flat surface that would be difficult or expensive to create from several solid boards.
Plywood works well for:
- Cabinet backs
- Small tabletops
- Shelf panels
- Storage boxes
- Workbench surfaces
- Project bases
Plywood is sold in different thicknesses, grades, and face qualities. A utility-grade sheet may be suitable for hidden structural parts, while a smoother furniture-grade panel is better for visible surfaces.
Full sheets can be difficult for beginners to transport and cut safely. Many stores sell smaller project panels or may offer basic cutting services.
Build From a Clear Materials List
A detailed plan can help you identify the correct board sizes, quantities, and cuts before you spend money on lumber.
Explore beginner-friendly woodworking plans and project ideas.
Buy Enough Wood for Mistakes and Defects
Purchasing only the exact total length shown in a plan can leave no room for damaged ends, knots, test cuts, or measuring mistakes.
For a small beginner project, consider buying one additional board or allowing roughly 10 percent extra material. The correct amount depends on the project, the quality of the available lumber, and how efficiently the parts fit onto each board.
Extra material can also be used to:
- Test a saw setting
- Practice drilling pilot holes
- Check stain or paint color
- Practice sanding
- Replace a damaged component
A small offcut is much less expensive than replacing an entire project because an important piece was cut incorrectly.
Match the Wood to Your Available Tools
Material selection should also reflect the tools you currently own. Thick hardwood may be challenging to cut accurately with a small hand saw, while basic pine boards are usually more manageable.
Before starting, confirm that you have the essential tools needed to measure, cut, drill, fasten, and smooth the selected material. Review the essential woodworking tools for beginners if you are still assembling your first toolkit.
Using appropriate lumber reduces strain on tools and makes it easier to develop accurate techniques.
Plan the Finish Before Selecting Lumber
Your intended finish can influence which boards you purchase.
If You Plan to Paint
Choose straight boards with sound surfaces, but do not pay extra for dramatic grain. Small cosmetic imperfections can often be filled and sanded before painting.
If You Plan to Stain
Select boards with similar color and grain so the finished components look consistent. Test the stain on an offcut because different boards may absorb it unevenly.
If You Plan to Use a Clear Finish
Look for attractive grain, minimal damage, and boards that complement one another. Clear finishes preserve the natural appearance, so imperfections will remain visible.

A Simple Wood-Selection Process for Beginners
Use this straightforward process when shopping for your next project:
- Review the complete project plan and cut list.
- Determine whether the project will be used indoors or outdoors.
- Decide whether the wood will be painted, stained, or left natural.
- Choose a beginner-friendly species that matches the project.
- Confirm the actual board dimensions.
- Inspect each board for warping, cracks, loose knots, and damaged edges.
- Purchase a small amount of extra material.
- Store the lumber flat and dry until construction begins.
This process becomes faster with experience. After completing several projects, you will begin recognizing which materials work best for different designs.
Common Lumber-Buying Mistakes to Avoid
Beginners can prevent many project problems by avoiding a few common mistakes:
- Buying warped boards without inspecting them
- Choosing expensive hardwood for a first practice project
- Ignoring actual lumber dimensions
- Using indoor lumber for an exposed outdoor project
- Purchasing exactly enough material with no allowance for mistakes
- Mixing boards with noticeably different thicknesses or moisture levels
- Selecting wood before reviewing the full plan
A careful five-minute inspection at the store can save hours of frustration during assembly.
Choose a Project Before Buying Lumber
Starting with a complete plan makes it easier to select appropriate wood, estimate quantities, and avoid unnecessary purchases.
Browse practical woodworking plans for your next beginner project.
Final Thoughts
The best beginner lumber is not necessarily the most expensive or visually impressive option. It is the material that suits the project, works safely with your tools, and allows you to practice accurate construction without unnecessary difficulty.
Start with straight, affordable boards such as pine or poplar, inspect every piece before buying it, and follow the dimensions listed in your plan. As your skills improve, you can gradually explore hardwoods, specialty plywood, and more advanced materials.
Choosing wood carefully gives your project a stronger foundation and makes every later step—from measuring and cutting to sanding and finishing—more manageable.

