
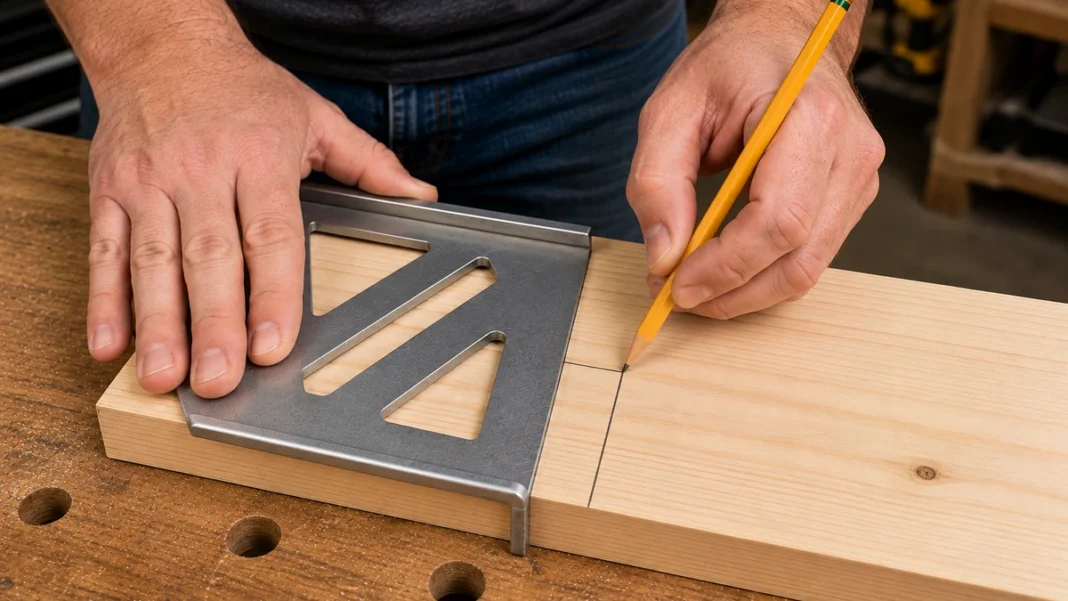
A speed square is one of those inexpensive tools that can quickly become one of the most-used items in a beginner’s workshop. It can help you mark straight crosscuts, lay out 45-degree lines, check corners for square, mark basic angles, and even guide a circular saw.
If you are learning how to use a speed square for beginners, start with the simplest jobs first. Learn how to keep the square firmly against the edge of a board, make accurate pencil marks, and understand which part of the tool you are using before moving on to angle layout or saw-guide work.
This guide walks through the parts of a speed square, the most useful beginner techniques, common mistakes, and a few practical ways to improve the accuracy of your woodworking projects.
What Is a Speed Square?
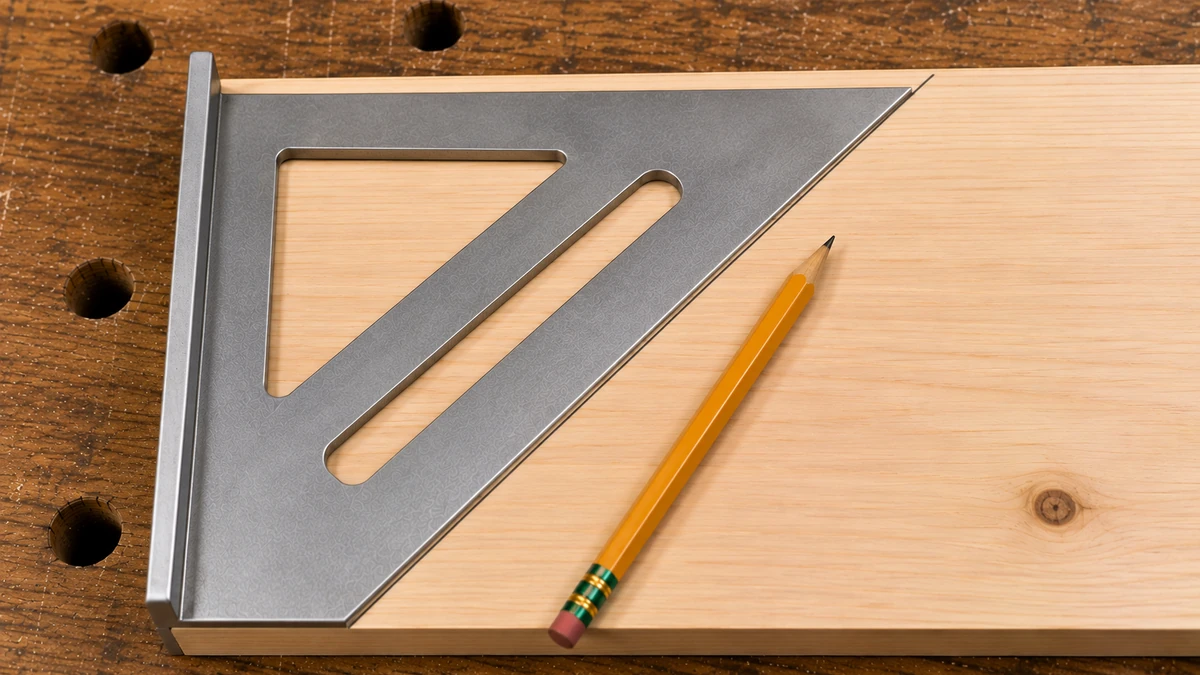
A speed square is a triangular measuring and layout tool commonly used in woodworking, carpentry, framing, and general DIY projects.
Despite the name, it does much more than check whether something is square. Depending on the model, you can use it to:
- Mark 90-degree crosscut lines
- Mark 45-degree lines
- Check whether a corner is square
- Measure short distances
- Lay out basic angles
- Mark lines parallel to the edge of a board
- Guide a circular saw for short straight cuts
A speed square is particularly useful when you are learning how to measure and cut wood accurately, because good cuts begin with accurate layout lines.
Know the Basic Parts of a Speed Square
Speed squares vary slightly by manufacturer, but most share several basic features.
The Lip or Fence
The raised lip along one side hooks over the edge of the board. This is one of the most important parts for beginners because it helps keep the square aligned with the workpiece.
Whenever possible, press the lip firmly and evenly against a straight reference edge before making a mark.
The 90-Degree Edge
This edge lets you draw a line perpendicular to the edge of the board. It is the part you will use for basic crosscut layout.
The 45-Degree Edge
The angled side of the triangle provides a quick way to mark a 45-degree line.
The Pivot Point
The pivot point is located near one corner of the square. It becomes the reference point when rotating the tool to lay out an angle.
The Degree Scale
The curved scale along the square allows you to mark angles other than 45 or 90 degrees. The exact markings can vary between manufacturers, so check your particular square before relying on unfamiliar scales.
Ruler and Scribing Features
Most speed squares also include ruler markings. Some models have notches or slots that can help you draw lines parallel to the edge of a board.
Not every square includes the same scribing features, so use only the markings and openings clearly provided on your particular tool.
7-Inch vs. 12-Inch Speed Square
A 7-inch speed square is a great choice for most beginning woodworking and DIY tasks. It is lightweight, easy to hold, and large enough for common dimensional lumber.
A 12-inch speed square gives you a longer reference edge and can be useful on wider boards or larger construction projects.
Beginners do not necessarily need both sizes. If you mainly work with ordinary boards and smaller woodworking projects, a 7-inch model is usually a practical starting point.
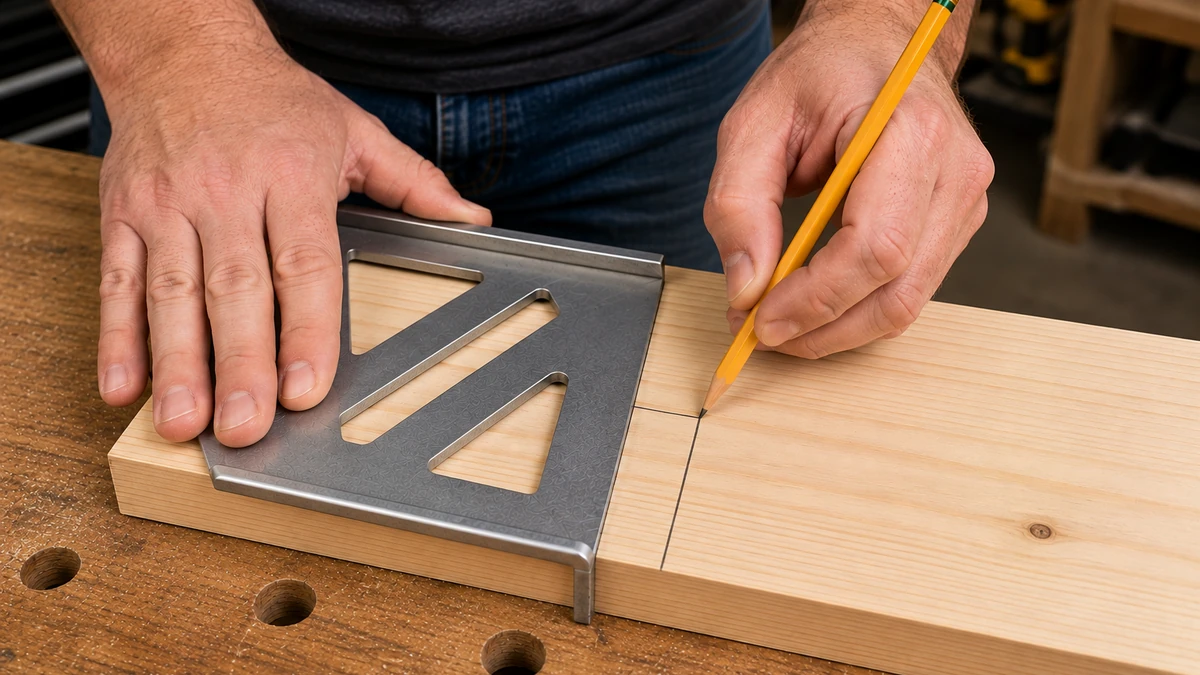
How to Mark a Straight 90-Degree Crosscut Line
When learning how to use a speed square for beginners, marking an accurate 90-degree crosscut line is the best technique to practice first.
This is the first speed-square technique every beginner should learn.
Start by measuring where you want the cut and make a small pencil mark along the edge of the board.
Place the lip of the speed square firmly against that edge. Slide the square until the straight 90-degree edge passes through your measurement mark.
Hold the square securely with one hand and draw a pencil line across the board with the other.
Before moving the square, look at the line and make sure it begins exactly at your measurement mark.
Do not let the lip pull away from the board while marking. Even a small amount of movement can produce a line that is no longer square.
How to Mark a 45-Degree Line
Speed squares make 45-degree layout very simple because one edge is already fixed at that angle.
Place the lip firmly against the board. Position the square so the 45-degree edge passes through the point where you want the angled line to begin.
Hold the tool still and draw along the angled edge.
This is useful when laying out simple miters, decorative corners, braces, and other angled woodworking parts.
Always remember that marking an accurate line is only the first step. Your saw still needs to follow that line correctly.
How to Check Whether a Corner Is Square
You can also use a speed square to make a quick check of a board or assembly.
Place the lip or one straight edge firmly against one side of the workpiece and bring the 90-degree edge against the adjoining side.
If both edges sit tightly against the surfaces without a visible gap, the corner is approximately square.
If you can see a gap, the corner or board end may be out of square.
For precision joinery, you may eventually want a dedicated combination square or machinist-style square, but a speed square is excellent for fast shop checks and general DIY work.
Use the Speed Square for Short Measurements
The ruler markings along the edges can be useful for short measurements and quick layout work.
For example, if you need a mark 2 inches from the end of a board, you can often position the square against the end and use its scale rather than reaching for a separate ruler.
For longer or highly critical dimensions, however, use a tape measure or another appropriate measuring tool.
The goal is not to make the speed square do every measuring job. The goal is to use it where its shape and fixed angles make the work faster and more reliable.
How to Mark a Basic Custom Angle
As you become more comfortable with how to use a speed square for beginners, basic angle layout is the next useful skill to practice.
Once you are comfortable with 90-degree and 45-degree lines, you can begin using the pivot point and degree scale.
Place the pivot point at the spot where the angle should begin and keep it against the edge of the board.
Rotate the square until the desired degree marking aligns with the same reference edge of the board.
Hold the square firmly in that position and draw your layout line along the appropriate edge.
Because speed-square markings can differ slightly between brands and models, familiarize yourself with your own square before laying out an important part.
Practice angles such as 30 degrees or 60 degrees on scrap lumber and verify them before using the technique on finished project pieces.
How to Mark a Line Parallel to a Board Edge
Some speed squares include scribing notches or slots at common measurement intervals.
If your square includes them, place the lip against the board edge and put your pencil into the appropriate notch.
Then slide the square and pencil together along the edge of the board while maintaining steady contact.
This can create a line that stays a consistent distance from the reference edge.
If your speed square does not include proper scribing notches, do not try to force the pencil against an unsuitable opening. Measure several points from the edge and connect them with a straightedge instead.
Using a Speed Square as a Circular Saw Guide
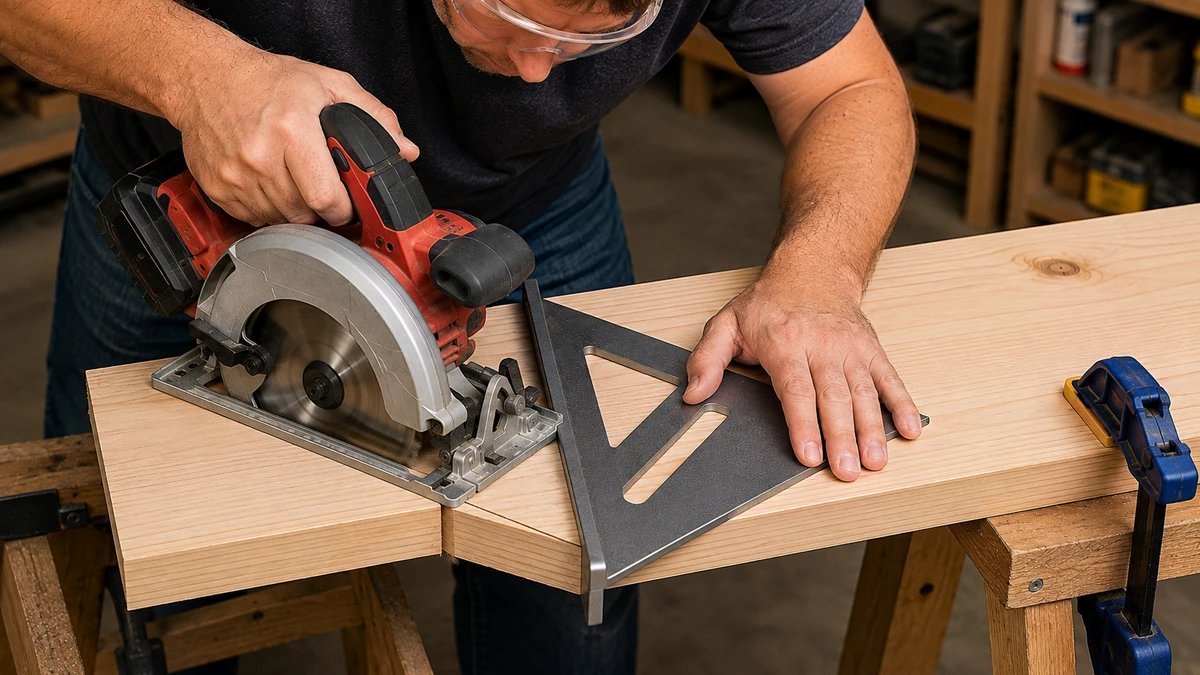
One of the most useful advanced beginner techniques is using the speed square as a short guide for a circular saw.
The idea is simple: the saw’s shoe rides against the straight edge of the square, helping the saw travel across the board in a straight line.
However, this technique requires more attention than simply drawing a pencil line.
Secure and Support the Board
The workpiece must be supported so it cannot move unexpectedly during the cut.
Make sure the cut-off portion can separate without pinching the blade and that the blade will not contact your workbench or support surface underneath.
Position the Square
Place the speed square so its lip is firmly against the board edge and its straight edge is positioned to guide the saw shoe along the desired cutting path.
Remember that the blade is offset from the edge of the saw shoe. Do not assume that placing the square directly on the pencil line will automatically put the blade on the correct side of that line.
Set the saw in position with the power off and verify where the blade will actually cut.
Keep Your Hand Out of the Blade Path
Hold the square securely, but never place your fingers where the blade could reach them.
Before starting the saw, visualize the entire path of the blade and the saw shoe.
Start the Saw Before Entering the Wood
With the saw properly positioned and the blade clear of the workpiece, start the saw and allow the blade to reach operating speed.
Guide the saw forward while keeping the shoe firmly against the square.
Do not force the saw sideways into the square. The square is a guide, not something you should fight against throughout the cut.
Finish the Cut Smoothly
Continue forward until the blade has completely cleared the workpiece.
Release the trigger and allow the blade to stop before setting the saw down.
If you are new to this technique, practice on scrap wood before trying it on an important project part.
For additional guidance on what a speed square can do, This Old House provides a useful overview of speed-square techniques, including basic layout and saw-guide applications.
Keep the Lip Flush Against the Board
A speed square is only accurate when it has a reliable reference surface.
If the lip is sitting on sawdust, a splinter, a rounded corner, or an uneven edge, your line may not be truly square.
Wipe debris away and check that the square is contacting the board properly before drawing the line.
This is also why choosing reasonably straight material matters. If you are still learning lumber selection, see our guide on choosing the right wood for beginner woodworking projects.
Use the Same Reference Edge
When laying out several measurements on the same workpiece, try to work from one known straight edge whenever practical.
Switching randomly between edges can compound small inaccuracies, especially if the board itself is not perfectly straight or square.
Marking and measuring from consistent reference surfaces is a fundamental woodworking habit that becomes even more important as your projects involve more precise parts and basic woodworking joints.
Common Speed Square Mistakes for Beginners
Letting the Square Move While Marking
If the lip moves away from the board edge while you draw, the resulting line may no longer be 90 degrees.
Keep steady pressure against the reference edge until the pencil line is complete.
Using a Damaged Square
A square that has been badly bent, warped, or damaged may no longer provide an accurate reference.
Inspect the tool if your layout lines repeatedly seem wrong.
Reading the Wrong Scale
Speed squares can contain several scales and sets of markings.
Beginners sometimes assume every number on the tool represents the same type of measurement.
For basic woodworking, concentrate first on the ruler, 90-degree edge, 45-degree edge, pivot point, and basic degree scale.
Measuring From the Wrong Edge
Decide which board edge is your reference before laying out several parts.
Changing reference edges without thinking can introduce unnecessary errors.
Assuming the Pencil Line Has No Thickness
A pencil line has width.
When accuracy matters, decide whether your saw cut should remove the line, split the line, or remain on the waste side of it.
Consistent measuring and marking techniques are often more important than trying to work to unrealistic levels of precision.
Using the Wrong Tool for the Job
A speed square is extremely versatile, but it is not a replacement for every ruler, straightedge, combination square, or measuring tool in the shop.
Use it for the jobs it handles well rather than forcing it to perform a task for which another tool would be more accurate or convenient.
Speed Square Safety Tips
The speed square itself is a simple hand tool, but safety becomes especially important when it is used around saws.
- Keep fingers away from the intended blade path.
- Secure and support the workpiece before cutting.
- Inspect the saw’s blade path before starting the motor.
- Keep the saw shoe flat on the wood throughout the cut.
- Do not allow the square to shift while guiding the saw.
- Wear appropriate eye protection when cutting wood.
- Never reach beneath the workpiece while the saw is operating.
For pencil layout work, the main concern is accuracy. For power-tool work, both accuracy and safe hand placement matter.
Practice on Scrap Wood First
One of the fastest ways to become comfortable with a speed square is to spend a few minutes practicing on scrap lumber.
Mark several 90-degree crosscut lines and check whether the lip stayed tight against the board.
Then practice 45-degree lines.
Next, choose a simple angle such as 30 degrees and practice rotating from the pivot point to the correct degree marking.
If your square includes scribing features, practice drawing a short parallel line.
Only after those operations feel natural should you consider practicing with the speed square as a circular saw guide.
Practicing how to use a speed square for beginners on scrap wood helps you build confidence with square lines, angles, and tool positioning before working on an important project.
Accuracy Starts Before the Cut
A speed square reinforces one of the most important lessons in woodworking: the quality of a cut depends heavily on the quality of the layout that came before it.
If the measurement is wrong, the cut will be wrong. If the square shifts while marking, the line may be wrong. If you cut on the wrong side of the line, even a perfectly controlled saw cannot correct the original mistake.
Learning to slow down during measuring and layout often makes the actual cutting stage much easier.
That same attention to small adjustments is useful throughout woodworking. For example, our guide to using a hand plane for beginners explains how tiny controlled cuts can improve the fit and finish of a project after the primary layout and cutting are complete.
Build Your Skills With Real Projects
Once you understand how to use a speed square for basic layout, start putting those skills into simple projects.
Learning how to use a speed square for beginners becomes much easier when you repeatedly use the tool for real measuring, marking, and cutting tasks.
Repeatedly measuring boards, marking square cuts, laying out angles, and checking corners will make the tool feel more natural than practicing isolated techniques forever.
If you are ready to put these skills to work, you can explore woodworking plans and project ideas here. Working from a clear plan helps you see how accurate measuring, layout, cutting, joinery, and finishing come together in a complete project.
Final Thoughts on How to Use a Speed Square for Beginners
Learning how to use a speed square for beginners starts with a few basic habits: keep the lip firmly against a reliable reference edge, mark carefully, understand which scale you are reading, and check your layout before cutting.
Master the 90-degree crosscut line first. Then practice 45-degree marks, checking corners, short measurements, parallel lines, and basic angle layout.
Once those techniques are comfortable, you can begin using the square for more advanced jobs such as guiding a circular saw.
A speed square may be simple, but it can improve almost every stage of a beginner woodworking project by helping you make more accurate decisions before the blade ever touches the wood.

