
Learning how to drill pilot holes for wood screws is one of the simplest ways to make beginner woodworking projects easier and more reliable. A properly sized pilot hole helps guide the screw, reduces the force needed to drive it, and lowers the chance of splitting the wood.
Pilot holes become especially useful when working near the end of a board, fastening hardwood, using larger screws, or assembling parts that need to stay accurately aligned. The process only takes a few extra seconds, but it can prevent damaged lumber, crooked screws, and frustrating repairs.
This beginner guide explains what pilot holes are, how to choose a drill-bit size, how deep to drill, when to use clearance holes and countersinks, and the common mistakes to avoid.
What Is a Pilot Hole?
A pilot hole is a small hole drilled into the wood before a screw is driven into place. The hole creates a path for the center of the screw while still leaving enough surrounding wood for the threads to grip.
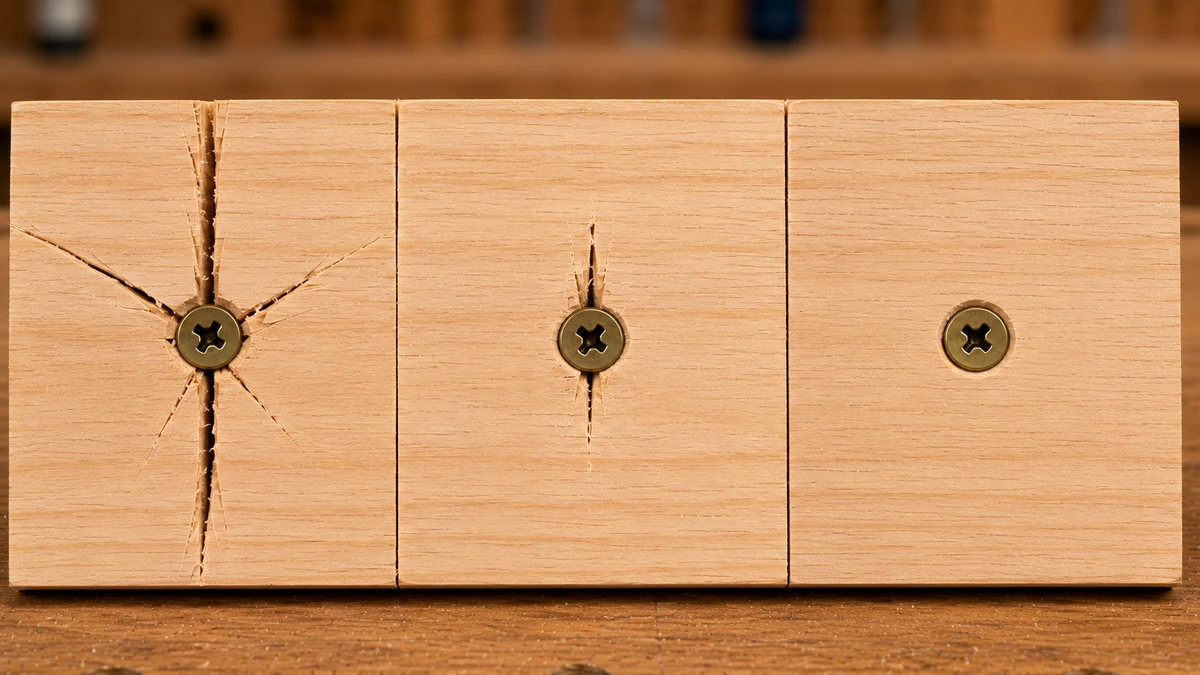
Without a pilot hole, the screw has to force wood fibers apart as it enters. Soft woods may tolerate this in some situations, but harder woods, narrow pieces, and screws positioned close to an edge are more likely to split.
A pilot hole can also make it easier to start the screw exactly where you marked it instead of allowing the screw point to wander across the surface.
Why Pilot Holes Matter in Beginner Woodworking
Beginners sometimes see pilot holes as an unnecessary extra step. In reality, drilling them can solve several common assembly problems.
- They help prevent splitting. Removing a small amount of material gives the screw room to enter without forcing the surrounding fibers apart as aggressively.
- They help screws start accurately. The drilled hole gives the screw point a defined path.
- They reduce driving resistance. This is especially helpful in dense hardwoods or when driving longer screws.
- They can reduce stripped screw heads. Less resistance means you are less likely to overload the driver bit while forcing the screw into the wood.
- They improve controlled assembly. Properly prepared holes make it easier to bring woodworking parts together without fighting the fastener.
Knowing how to drill pilot holes for wood screws is especially useful near board ends, in hardwood, and when working with larger fasteners.
The type of wood matters too. Pine, cedar, oak, maple, and other species do not all behave the same way when screws are driven into them. If you are still learning lumber selection, review our guide to choosing the right wood for beginner woodworking projects.
How to Choose the Right Pilot-Hole Drill Bit
The pilot hole needs to be large enough to make screw installation easier without being so large that the threads lose their grip.
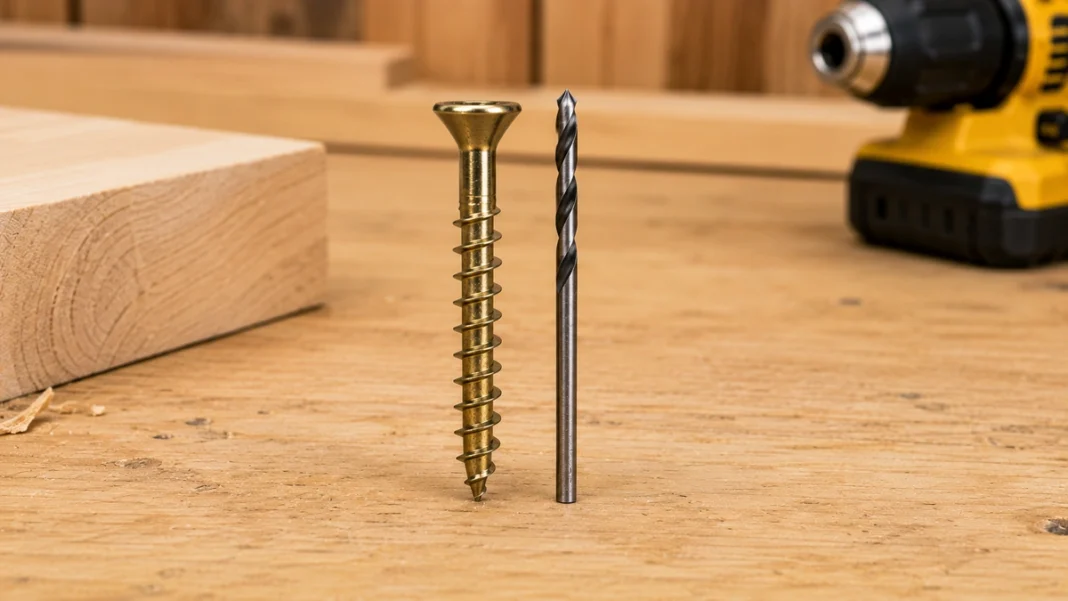
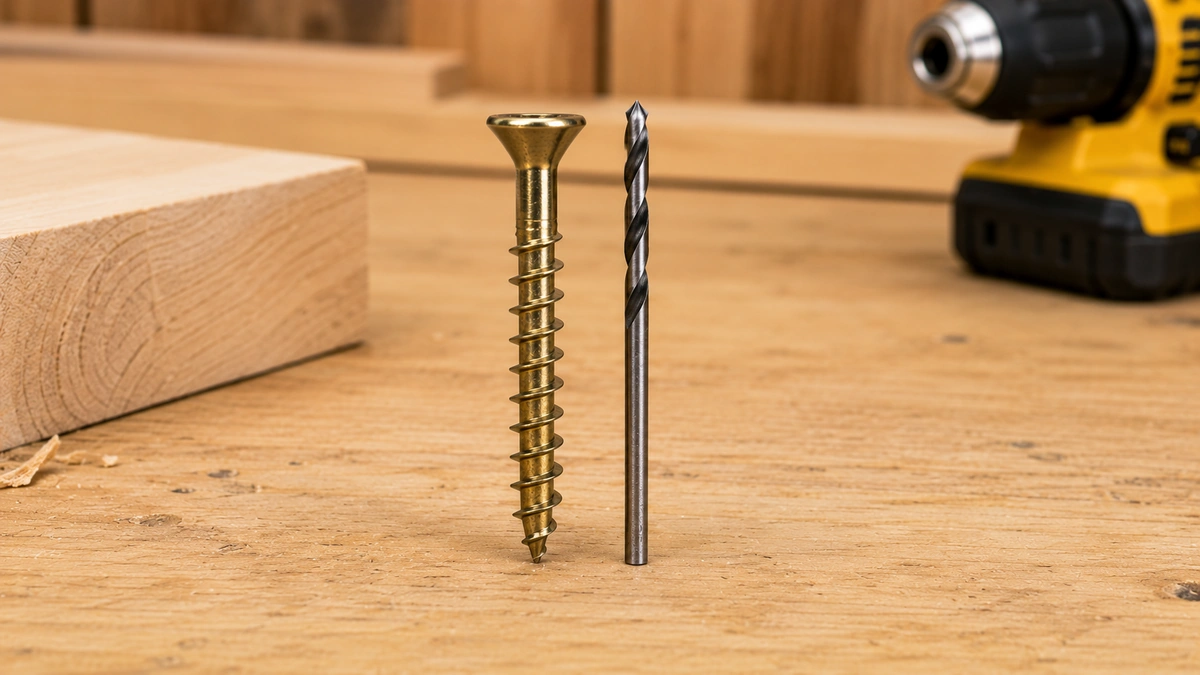
A useful starting point is to compare the drill bit with the solid core, or root, of the screw rather than the outside diameter of the threads.
Hold the drill bit directly in front of the screw. Ideally, you should still be able to see the screw threads extending beyond both sides of the bit.
For Softwood
When working with softer woods such as pine or cedar, a pilot bit around the diameter of the screw’s solid core is usually a practical starting point. In some situations, a slightly smaller pilot hole may still work because softer fibers compress more easily.
For Hardwood
Dense hardwoods generally benefit from a pilot hole that more closely matches the screw’s core diameter. Trying to force a screw through a very small pilot hole in dense wood can make the screw difficult to drive and increases stress on both the fastener and the driver bit.
If the screw manufacturer provides a recommended pilot-hole size, use that specification rather than relying only on a visual comparison.
How Deep Should a Pilot Hole Be?
The pilot hole should generally reach approximately as deep as the portion of the screw that will penetrate the receiving piece of wood.
It does not need to be dramatically deeper than the screw. Drilling far beyond the required depth wastes time and can accidentally break through the opposite face of a thin workpiece.
One simple beginner technique is to place the screw beside the drill bit and wrap a small piece of painter’s tape around the bit at the desired depth. Stop drilling when the tape approaches the surface.
A drill-stop collar is another option if you need to drill several holes to a consistent depth.
How to Drill Pilot Holes for Wood Screws Step by Step
Once you have selected the correct bit and depth, the actual drilling process is straightforward.
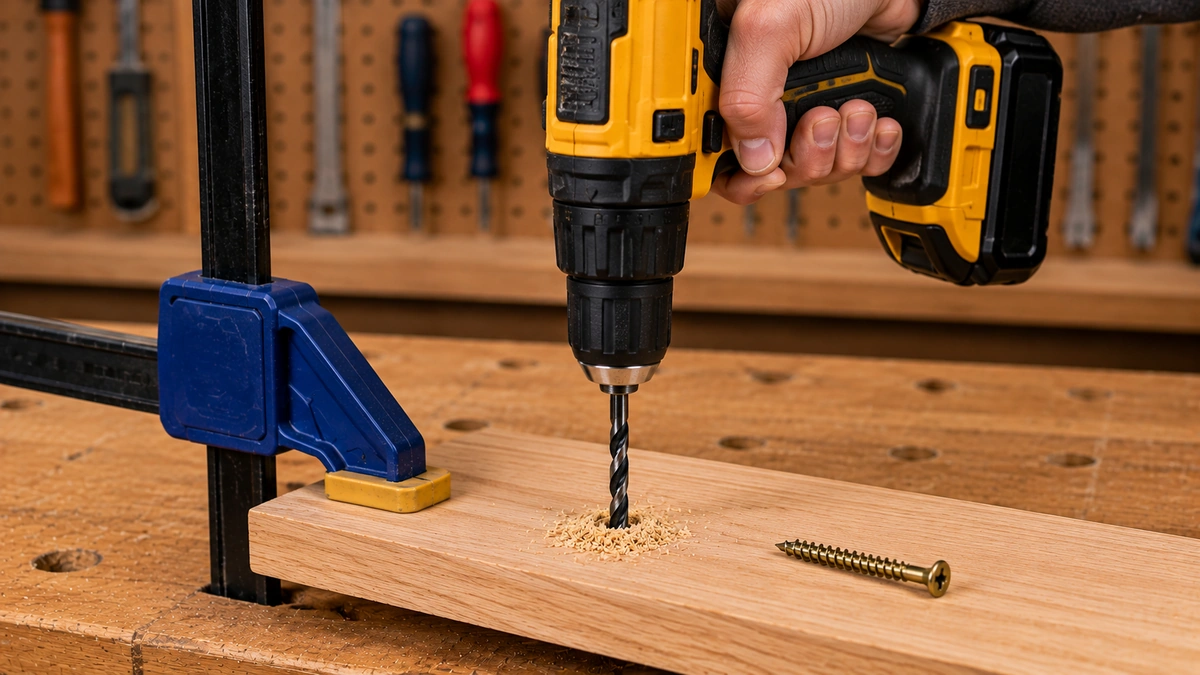
1. Mark the Screw Location
Measure carefully and make a clear pencil mark where the screw should enter.
Accurate fastening begins with accurate layout. If your measurements or marks are wrong, even a perfectly drilled pilot hole will be in the wrong location. Our guide on how to measure and cut wood accurately covers the basic layout habits that help prevent these mistakes.
2. Secure the Workpiece
Do not try to hold a small or unstable board with one hand while drilling with the other.
Place the wood on a stable work surface and use an appropriate clamp when necessary. If you are new to securing workpieces, see how to use woodworking clamps for beginners.
3. Install the Correct Drill Bit
Insert the pilot-hole bit into the drill chuck and tighten it securely.
Make sure the bit is straight and properly seated. A loose or crooked bit can wobble, enlarge the hole, or make accurate drilling difficult.
4. Position the Drill Straight
Place the tip of the drill bit directly on your mark. Before pulling the trigger, look at the drill from the side and from above to judge whether the bit is perpendicular to the wood surface.
For most basic screw installations, the goal is a pilot hole that follows the intended direction of the screw rather than leaning noticeably to either side.
5. Start Slowly
Begin drilling at a low or moderate speed so the bit can establish its position without wandering.
Once the bit has entered the surface cleanly, continue with steady pressure. You do not need to force the drill aggressively. Let the cutting edges of the bit remove the material.
6. Stop at the Planned Depth
Watch your tape marker or depth stop as you drill. Stop when the desired depth has been reached.
If you are drilling a deeper hole, occasionally backing the bit out can help clear accumulated chips.
7. Remove the Bit While It Is Aligned
Back the drill bit out along the same path it entered. Avoid bending or levering the drill sideways while the bit is still inside the hole.
8. Drive the Screw
Switch to the proper driver bit and start the screw in the prepared hole.
Keep the driver aligned with the screw head and use controlled pressure. As the screw becomes seated, slow down so you do not bury the head too deeply or strip the drive recess.
Pilot Hole vs. Clearance Hole
A pilot hole and a clearance hole perform different jobs, even though both are drilled before assembly.
A pilot hole is smaller than the screw threads and allows the threads to bite into the wood.
A clearance hole is large enough for the screw body to pass freely through the first piece of material. The screw threads then grip the second piece.
This can be useful when fastening two boards together because the screw can pull the second board firmly toward the first instead of the threads gripping both pieces independently.
Fine Woodworking’s guide to screw joinery provides a useful explanation of how pilot holes and clearance holes work together when joining wood with screws.
When Should You Countersink a Wood Screw?
Countersinking creates a shallow recess around the top of the drilled hole so a flat-head screw can sit flush with or slightly below the wood surface.
This can be useful when:
- You want the screw head flush with the project surface.
- A raised screw head would interfere with another component.
- You plan to cover the screw with wood filler or a plug.
- The finished appearance of the project matters.
A combination pilot-and-countersink bit can perform both operations efficiently, especially when you have several identical fasteners to install.
Do not countersink excessively. Driving the screw head far below the surface can crush wood fibers and weaken the area around the fastener.
When Pilot Holes Are Especially Important
Although you may not need a pilot hole for every screw in every type of wood, there are several situations where drilling one is particularly helpful.
Near the End of a Board
Wood is more likely to split when a screw is driven close to an end or edge. A correctly sized pilot hole reduces the wedging force created by the screw.
When Working With Hardwood
Oak, maple, and other dense woods can create substantial resistance. A pilot hole makes screw installation much easier and reduces stress on the fastener.
When Using Large or Long Screws
Larger fasteners displace more material. The bigger the screw, the more useful proper hole preparation becomes.
When Appearance Matters
If the screw must enter at a precise location or remain neatly aligned with other fasteners, a pilot hole gives you better control.
When Working With Narrow Parts
Thin rails, trim pieces, and narrow project components can split easily. Pilot drilling becomes especially valuable when there is not much material surrounding the screw.
Should You Use Glue With Wood Screws?
Sometimes screws are the primary fasteners, while other projects use screws to hold a glued joint together during assembly.
Whether glue should be added depends on the project design and the type of joint. Do not assume that adding glue automatically improves every screw connection.
When a project does call for adhesive, proper surface preparation and even pressure matter. See our beginner guide to using wood glue and clamping wood properly.
Pilot Holes and Pocket-Hole Joinery
Pocket-hole joinery also uses carefully controlled drilling to prepare a path for specialized screws, although the process is different from drilling a conventional straight pilot hole.
A pocket-hole jig positions the drill bit at a controlled angle and establishes the proper hole geometry for the joint.
If you are interested in that method, read our guide on how to use a pocket hole jig for beginners.
Common Pilot-Hole Mistakes to Avoid
Using a Bit That Is Too Small
An undersized pilot hole may still leave too much resistance, especially in hardwood. This can make screws difficult to drive and may still allow the wood to split.
Using a Bit That Is Too Large
If the pilot hole is too large, the screw threads may not have enough wood to grip securely.
Drilling Crooked
A crooked pilot hole usually produces a crooked screw. Check the drill angle before starting and continue to monitor it as the hole gets deeper.
Drilling Too Deep
A pilot hole that accidentally exits the opposite surface can damage an otherwise usable project piece. Mark the required depth before drilling.
Skipping Clamps
If the workpiece moves while you drill, your hole may shift away from the intended mark. Secure unstable material before drilling.
Driving the Screw Too Far
Once the screw is seated, additional torque can strip the wood fibers, damage the screw head, or crush the surface.
Using the Wrong Driver Bit
The driver bit should fit the screw recess properly. A poorly fitting bit is more likely to slip and damage the screw head.
Practice Pilot Holes on Scrap Wood First
Before fastening an important project piece, make a few practice holes in scrap material of similar thickness and species.
Try different bit sizes and observe how easily the screw drives. Look at whether the wood splits, whether the threads grip securely, and how the screw head seats against the surface.
A few minutes of practice can give you much more confidence than experimenting for the first time on a finished project component.
Use Pilot-Hole Skills on Real Woodworking Projects
Once you are comfortable drilling pilot holes, start using the technique on simple projects such as shelves, storage boxes, small benches, plant stands, shop organizers, and other screw-assembled builds.
Repeated use will teach you when a pilot hole is essential, when a clearance hole will improve assembly, and how different types of wood respond to fasteners.
If you want projects where you can practice measuring, drilling, fastening, joining, and assembling wood, explore these woodworking plans and project ideas and choose a build that fits your current tools and experience.
How Pilot Holes Fit Into Better Woodworking Joints
Screws are only one method of joining wood. Depending on the project, you may also encounter butt joints, pocket holes, dowels, rabbets, dados, and other forms of joinery.
Understanding how fasteners interact with different joints will help you choose a stronger and cleaner assembly method. You can continue with our overview of woodworking joints for beginners.
Final Thoughts on Drilling Pilot Holes for Wood Screws
Learning how to drill pilot holes for wood screws comes down to a few dependable habits: choose a bit that matches the screw and wood, mark the location accurately, secure the workpiece, drill straight to the proper depth, and drive the screw with controlled pressure.
Do not worry about memorizing every possible screw and drill-bit combination when you are starting out. Learn to recognize the screw’s core diameter, follow manufacturer recommendations when they are available, and test uncertain setups on scrap wood first.
That small amount of preparation can mean the difference between a clean, secure connection and a split board or damaged screw. Once pilot drilling becomes part of your normal assembly process, it will feel like a natural step rather than extra work.

