
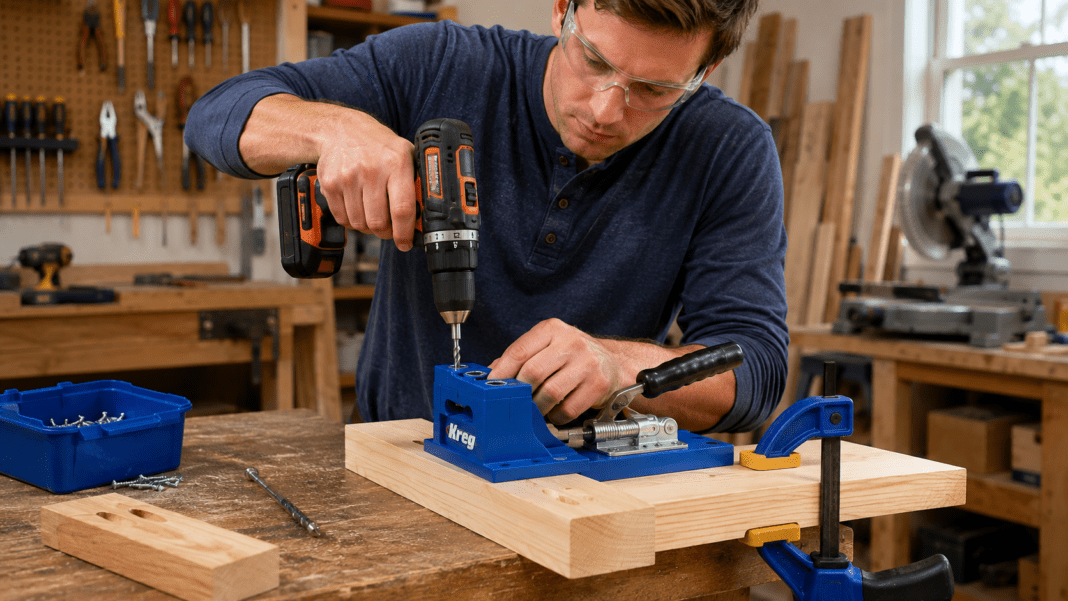
Pocket hole joinery is one of the easiest ways for a beginner woodworker to connect two pieces of wood quickly and securely. Instead of cutting complicated traditional joints, you use a jig to guide a drill bit at an angle, then drive a specially designed screw through the pocket hole and into the adjoining board.
If you are learning how to use a pocket hole jig for beginners, the most important thing to understand is that good results depend on careful setup. You need to know the actual thickness of your wood, set the jig and drill bit correctly, clamp everything securely, choose the right screw, and avoid overtightening the joint.
This guide walks through the process step by step so you can create clean, repeatable pocket hole joints without making the common mistakes that frustrate first-time users.
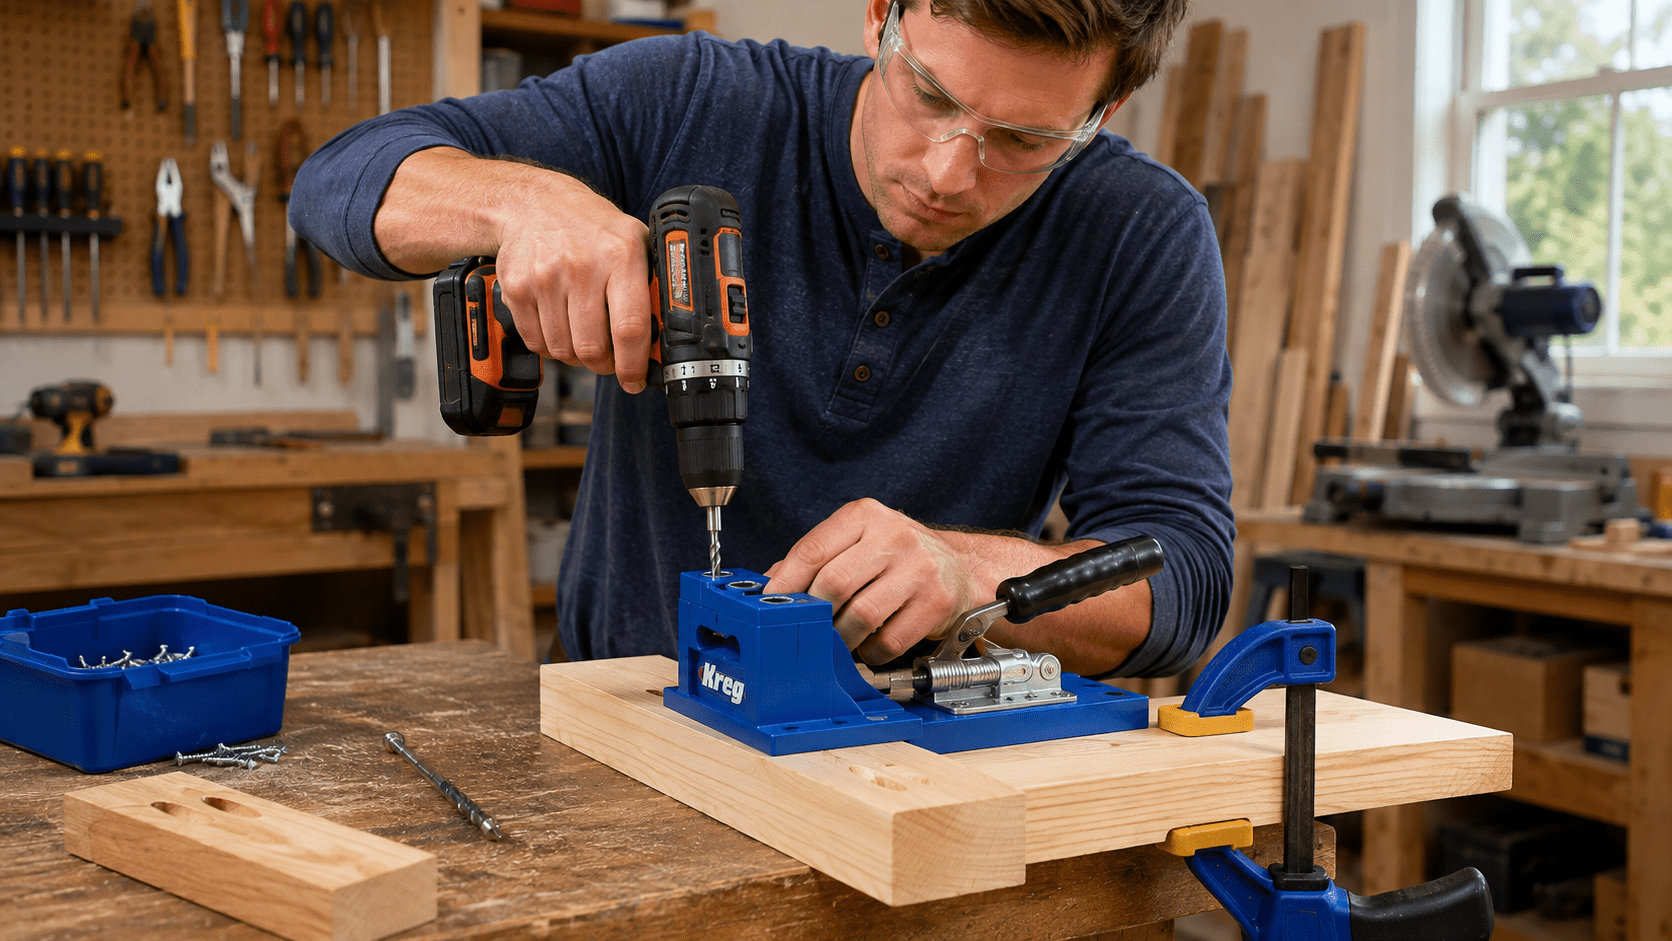
What Is Pocket Hole Joinery?
Pocket hole joinery uses an angled hole drilled into one workpiece so a screw can pass through that board and into a second piece of wood.
The angled opening creates a recessed “pocket” that guides the screw into the adjoining board. Depending on how the project is assembled, the pocket holes can often be positioned on the back, bottom, or inside of the finished piece where they are less noticeable.
Pocket holes are commonly used for projects such as:
- Face frames
- Picture and cabinet frames
- Shelves
- Small tables
- Benches
- Cabinets
- Bookcases
- Simple furniture
- Workshop projects
They are especially useful for beginners because the jig controls the drilling angle for you. That removes much of the guesswork involved in creating the joint.
If you are still learning the basic ways that boards can be connected, our guide to 7 Essential Woodworking Joints for Beginners provides a useful overview of several common joinery methods.
How Does a Pocket Hole Jig Work?
A pocket hole jig holds or guides a specially shaped drill bit at a consistent angle while you drill into the workpiece.
Most systems include some combination of:
- A drill-guide block or jig body
- A stepped pocket-hole drill bit
- A depth-stop collar
- A driver bit
- A clamp or clamping system
- Material-thickness adjustments or markings
The stepped drill bit creates both the angled pilot hole and the larger recessed pocket that accepts the head of the pocket-hole screw.
Different jig models adjust in different ways. Some require you to reposition a drill guide. Others automatically compensate for certain material thicknesses. Always follow the instructions supplied with your specific jig rather than assuming every model uses the same settings.
How to Use a Pocket Hole Jig for Beginners: 9 Steps
The basic process is simple, but the setup matters. Work through these steps in order instead of rushing directly to drilling.
1. Measure the Actual Thickness of the Wood
Before adjusting the jig, measure the actual thickness of the board you will be drilling into.
This matters because lumber dimensions are not always the same as the name printed on the label. For example, a board sold as “1-inch” lumber is often thinner than a full inch after milling.
Use a tape measure, ruler, or suitable thickness gauge to determine the real dimension of the workpiece.
Material thickness affects three important parts of pocket hole setup:
- The jig or drill-guide position
- The drill-bit depth
- The pocket-hole screw length
Kreg’s material-thickness guide for pocket hole joinery explains why these settings must work together for a properly formed joint.
If measuring accurately is still a challenge, review How to Measure and Cut Wood Accurately: A Beginner’s Guide before beginning your first pocket-hole project.
2. Adjust the Jig for the Material Thickness
Once you know the actual thickness of the board, adjust the pocket hole jig according to the manufacturer’s instructions.
Depending on the jig, this may involve changing the height of the drill guide, sliding a guide block to a marked setting, or using an automatic adjustment mechanism.
Do not guess at this setting.
If the jig is configured for material that is much thicker or thinner than the board you are actually using, the pocket hole may exit in the wrong place or the screw may not enter the second workpiece correctly.
Take a few extra seconds to confirm the thickness setting before drilling.
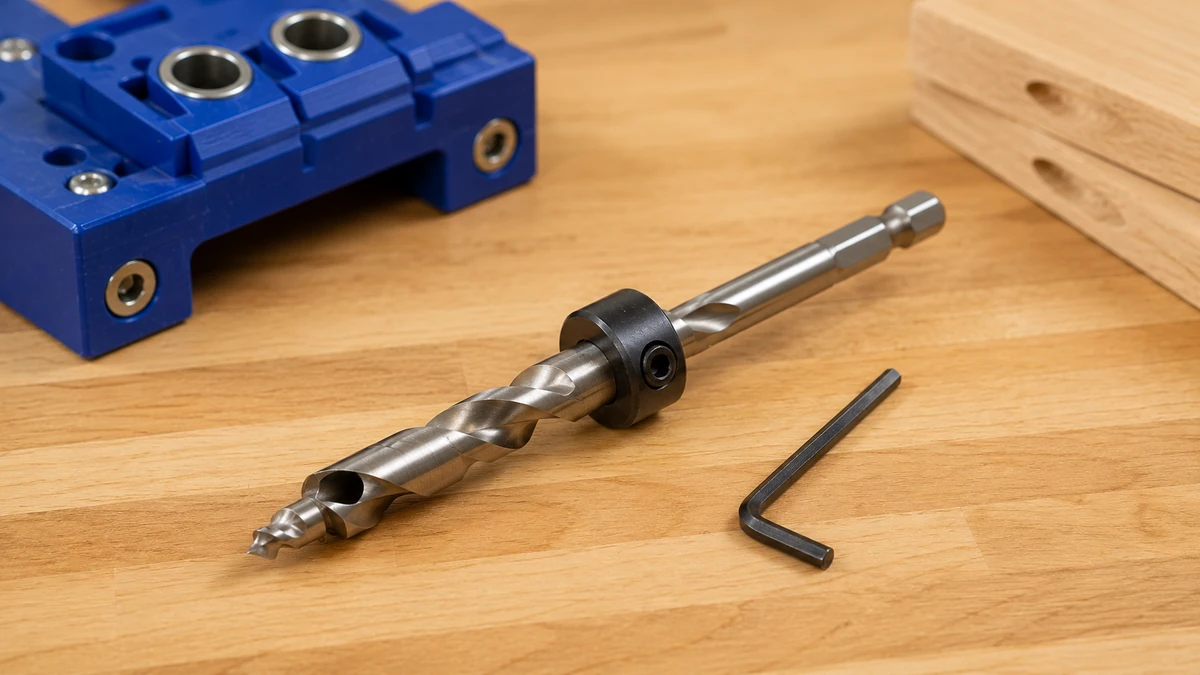
3. Set the Drill Bit and Stop Collar
The stop collar controls how deeply the stepped drill bit can travel through the jig.
Slide the collar onto the bit and position it according to the material-thickness setting specified by your jig manufacturer. Then tighten the collar securely using the supplied hex key or adjustment tool.
On some bits, engraved markings make common thickness settings easier to identify. Other systems use a separate setup gauge.
The important point is that the drill-bit depth must match the jig setup and material thickness.
If the stop collar is set too shallow, the pocket may not be deep enough. If it is set too deep, the bit may drill farther than intended and weaken or damage the workpiece.
4. Position and Clamp the Jig Securely
Place the jig in the correct position on the board and clamp it securely before drilling.
The jig should not move while the drill bit is cutting. Even a small shift can affect hole placement and make the final joint harder to align.
Make sure the workpiece itself is also supported on a stable surface.
Before drilling, check that:
- The board is flat and stable
- The jig is firmly positioned
- The clamp will not interfere with the drill
- The drill bit can enter and exit the guide smoothly
- Your hands are away from the drilling path
- The area beneath or behind the workpiece is clear
Wear appropriate eye protection when drilling. Wood chips and dust can be ejected as the stepped bit clears material from the pocket.
Our Beginner Woodworking Safety: Essential Workshop Rules covers additional habits worth reviewing before using unfamiliar tools and jigs.
5. Drill the Pocket Hole Smoothly
Insert the stepped drill bit into the jig’s drill guide before starting the cut according to your jig manufacturer’s instructions.
Keep the drill aligned with the guide and drill at a controlled pace. Do not force the bit through the wood.
As the bit cuts, it creates wood chips that must escape through the pocket and drill guide. If you are drilling a deep pocket or working with material that creates a lot of chips, withdrawing the bit slightly during the operation can help clear debris before continuing.
Continue until the stop collar reaches the point where it prevents further travel.
Then stop drilling and remove the bit from the guide.
The finished pocket should look clean and consistent. If the hole appears unusually shallow, deep, ragged, or misplaced, stop and recheck the material thickness, jig setting, and stop-collar position before drilling additional workpieces.
6. Space Multiple Pocket Holes Properly
Many joints work better with more than one pocket hole.
The correct spacing depends on the width and shape of the workpiece. A narrow rail may require two holes positioned relatively close together, while a wide panel may use several holes spaced along its edge.
Avoid placing pocket holes so close to an edge that there is too little wood surrounding the hole.
If your jig has multiple drill-guide openings, the manufacturer’s instructions may show which combinations are appropriate for common board widths.
The goal is to distribute the holding force while leaving enough solid wood around each pocket.
7. Choose the Correct Pocket Hole Screw
Pocket hole screws are designed differently from many ordinary wood screws. They typically have a head shape intended to seat against the shoulder inside the pocket rather than acting like a conventional countersunk screw.
Screw selection depends on factors such as:
- Material thickness
- Wood type
- Indoor or outdoor use
- The thickness of both pieces being joined
For many pocket-hole systems, coarse-thread screws are commonly recommended for softer woods such as pine, cedar, and fir, as well as plywood and MDF. Fine-thread versions are commonly used with dense hardwoods such as maple, oak, cherry, and walnut.
Do not choose screw length by appearance alone. Use the screw chart, selector, or instructions provided by the jig manufacturer.
A screw that is too short may not have enough purchase in the second board. A screw that is too long can protrude through the face of the workpiece.
8. Clamp the Joint Before Driving the Screws
After drilling the pockets, position the two project pieces exactly where you want them.
Check that their faces and edges are aligned, then clamp the joint before driving the pocket-hole screws.
This step is easy to underestimate.
As the screw enters the second board, it pulls the two pieces together. Without a clamp, that force can cause one board to shift slightly out of alignment.
Depending on the joint, you may use a face clamp, right-angle clamp, bar clamp, or another suitable woodworking clamp to keep the parts aligned.
9. Drive the Screw Without Overtightening
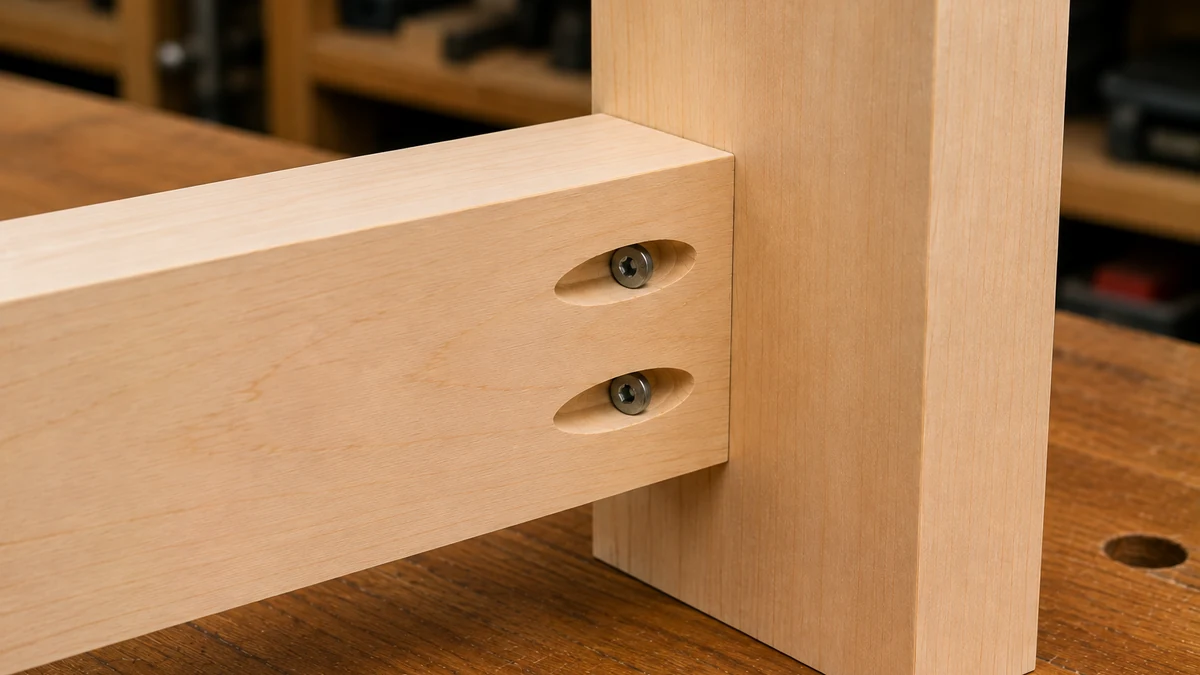
Insert the proper driver bit into your drill or driver and place the pocket-hole screw into the drilled pocket.
Drive the screw until the joint pulls together firmly and the screw head seats inside the pocket.
Then stop.
Do not keep driving simply because the tool still has power available.
Overtightening can strip the screw’s holding power in the second board, crush softer wood fibers, distort the joint, or cause alignment problems.
Beginners may find it helpful to start with a lower clutch setting on a drill/driver and increase it only if necessary. The goal is a snug joint, not maximum torque.
Should You Use Wood Glue With Pocket Holes?
Wood glue can often be used together with pocket-hole screws when the joint design provides good mating wood surfaces and the project benefits from a glued connection.
The pocket-hole screws can act as fasteners that pull the pieces together while the glue cures.
However, glue is not automatically required for every pocket-hole project. Some assemblies may need to come apart later, and certain materials or joint orientations may call for a different approach.
If you choose to use glue, apply an appropriate amount to the mating surfaces before clamping and driving the screws. Clean away excess squeeze-out before it hardens.
If you are new to glue-ups, see Wood Glue for Beginners: How to Glue and Clamp Wood Properly for a more complete explanation of applying glue, clamping parts, and allowing the joint to cure.
How to Make a Simple Pocket Hole Joint
Once the setup steps make sense, try a basic practice joint using two pieces of scrap wood.
- Measure the actual thickness of the board that will receive the pocket holes.
- Adjust the jig for that material thickness.
- Set and tighten the drill-bit stop collar.
- Clamp the jig securely to the scrap board.
- Drill two clean pocket holes.
- Position the second board against the drilled workpiece.
- Align the faces and edges carefully.
- Clamp the two pieces together.
- Choose the correct pocket-hole screws for the material.
- Drive the screws until the joint is snug without overtightening.
Inspect the finished joint before moving on.
The boards should remain aligned, the screw heads should seat inside the pockets, and the screws should not protrude through the opposite surface.
If something is wrong, use the scrap joint to diagnose the problem instead of immediately repeating it on your project.
Common Pocket Hole Jig Mistakes Beginners Should Avoid
Using the Nominal Lumber Size Instead of Actual Thickness
A board’s advertised dimensions may not equal its real dimensions. Measure the wood itself before setting up the jig.
Setting the Jig Incorrectly
If the jig’s material-thickness setting does not match the workpiece, the drilled pocket may not position the screw correctly.
Setting the Stop Collar Incorrectly
The stop collar determines drilling depth. Double-check its position before drilling the first hole.
Forcing the Drill
Let the stepped bit cut at a controlled pace. Forcing the drill can make the operation harder to control and may produce unnecessary heat or poor chip clearing.
Using the Wrong Screw
The correct screw depends on material thickness and wood type. Do not substitute a random screw simply because it fits through the pocket.
Skipping the Assembly Clamp
The pieces can shift when the screw begins pulling the joint together. Clamp the assembly before driving the screws whenever the joint requires it.
Overtightening the Screws
Once the joint is snug and properly seated, stop driving. More torque does not automatically make the joint better.
Drilling Every Hole Without Testing First
Make one test joint from scrap wood before drilling all of the project pieces. This confirms your settings, screw length, hole position, and assembly technique.
Where Should Pocket Holes Be Positioned?
Whenever possible, plan your project so the pockets end up on a less-visible surface.
For example, pocket holes might be positioned:
- On the back of a face frame
- Underneath a shelf
- Inside a cabinet
- On the underside of a tabletop assembly
- On the hidden side of a bench or small furniture project
If a pocket will remain visible, matching or paintable pocket-hole plugs may be used with some systems to fill the opening before finishing.
Planning these locations before drilling is much easier than discovering after assembly that all of the pockets face outward.
Our guide to How to Plan Your First Woodworking Project can help you think through the sequence of cuts, joints, assembly, and finishing before construction begins.
What Can Beginners Build With Pocket Hole Joinery?
Once you understand how to use a pocket hole jig for beginners, you can use the technique in many straightforward workshop and home projects.
Good practice projects can include:
- Simple picture frames
- Small shelves
- Workshop organizers
- Basic benches
- Plant stands
- Side tables
- Cabinet face frames
- Utility storage projects
Start with a project that uses square cuts and uncomplicated assemblies. That lets you concentrate on accurate measuring, alignment, and pocket-hole setup without trying to learn too many new techniques at the same time.
For more ideas, take a look at our 7 Small Woodworking Projects for a Weekend.
Ready to Put Pocket Hole Joinery to Work?
Practicing on scrap wood teaches the mechanics, but building a real project is where the technique starts to make sense. When you’re ready to use your new joinery skills, explore our woodworking plans and project ideas for your next build.
Build Better Pocket Hole Joints With Practice
Learning how to use a pocket hole jig for beginners comes down to following the setup process carefully rather than trying to work quickly.
Measure the actual material thickness. Match the jig setting to the wood. Set the stepped drill bit correctly. Clamp the jig securely. Drill at a controlled pace. Choose the correct screw. Align and clamp the assembly. Then drive the screw only until the joint is firmly seated.
Once those steps become routine, pocket hole joinery can be a practical option for many beginner woodworking projects.
You do not need to hide mistakes with extra force or more screws. Accurate setup and good alignment are what make the process repeatable.
If you are still building confidence with workshop tools, our Essential Woodworking Tools for Beginners guide can help you understand the other tools that pair well with a pocket hole jig for measuring, cutting, drilling, clamping, sanding, and assembling projects.
Turn Your First Joint Into a Finished Project
Once you can make a clean practice joint consistently, move on to a simple build that uses the same technique several times. Repetition is one of the fastest ways to improve your setup and assembly skills. When you’re ready, browse our beginner-friendly woodworking plans and choose a project that matches the tools and skills you already have.

