
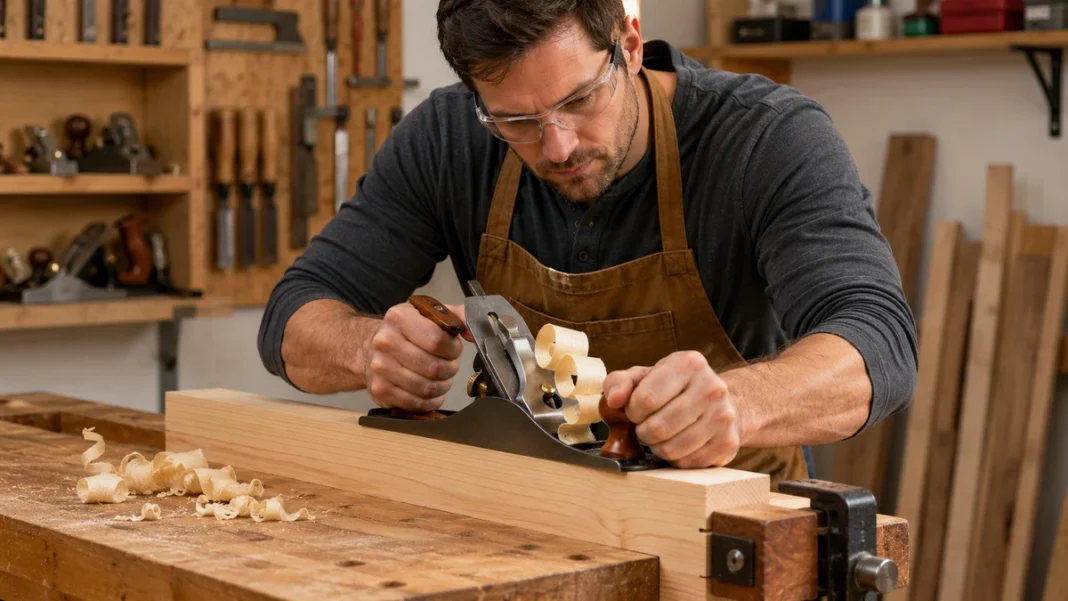
A hand plane is one of the simplest-looking woodworking tools, but learning to use one well can dramatically improve the way your projects fit and finish. With a properly adjusted plane, you can smooth rough surfaces, remove high spots, straighten edges, soften sharp corners, and make tiny fitting adjustments that would be difficult to control with a power tool.
If you are learning how to use a hand plane for beginners, the most important lesson is not to remove a lot of wood at once. A hand plane works best when the blade is sharp, the cut is light, and you let the tool take thin, controlled shavings.
This guide covers the basic parts of a hand plane, setup, grain direction, proper technique, common beginner mistakes, and several practical ways you can start using a plane in your woodworking projects.
What Does a Hand Plane Do?
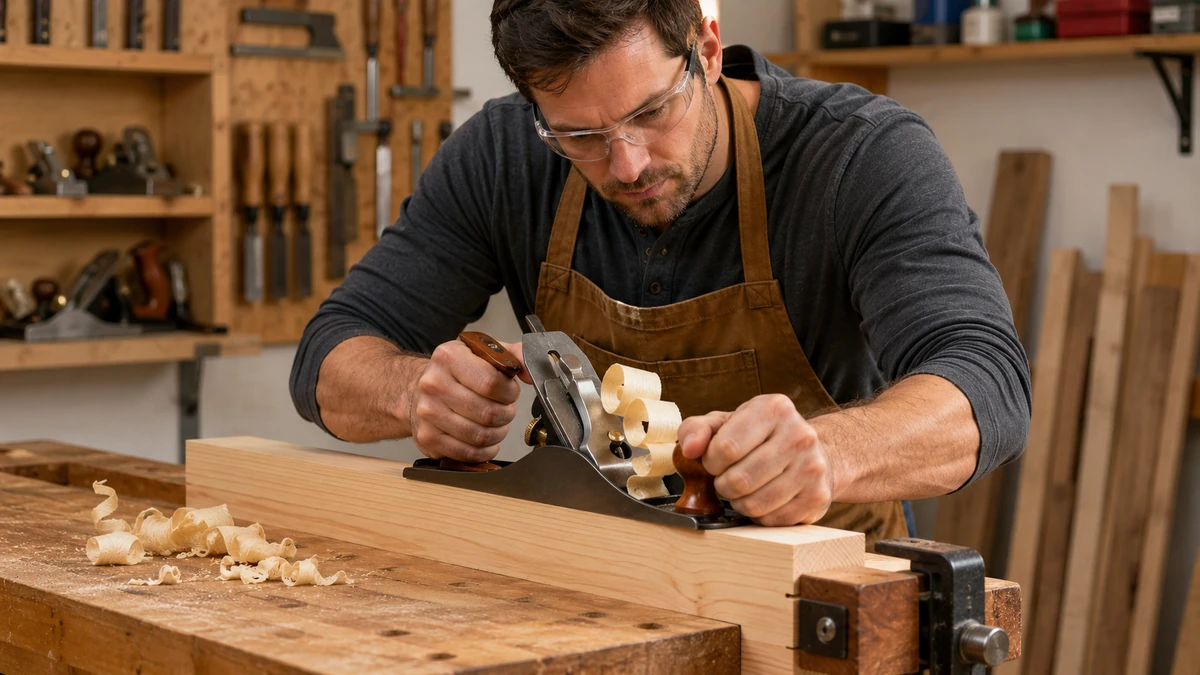
A hand plane uses a sharp iron blade that projects slightly through the bottom of a flat metal or wooden body. As you push the plane across a board, the blade removes a very thin shaving of wood.
That makes a hand plane useful for jobs such as:
- Smoothing a rough or uneven wood surface
- Removing small high spots
- Flattening portions of a board
- Refining and straightening edges
- Chamfering sharp corners
- Adjusting a board that is slightly too wide or thick
- Fine-tuning woodworking joints
Unlike a sander, which removes wood by abrasion, a properly sharpened hand plane actually cuts the wood fibers. The result can be an exceptionally clean surface.
If you are still building your basic woodworking skills, it also helps to understand how to choose the right wood for beginner woodworking projects, because different grain patterns and wood species can behave differently under a plane.
Choose a Beginner-Friendly Hand Plane
There are many specialized hand planes, but beginners do not need a large collection.
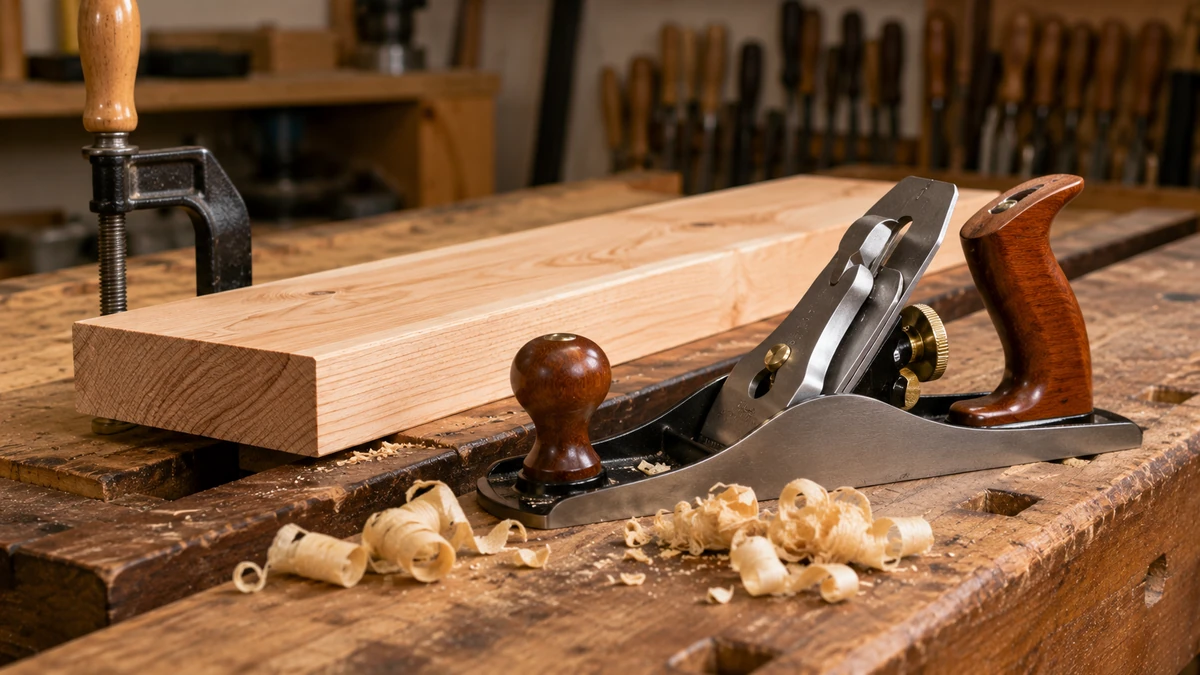
A general-purpose bench plane is a good place to begin. A No. 4 smoothing plane is popular for smoothing surfaces and general shop work, while a somewhat longer No. 5 jack plane can handle smoothing as well as basic flattening and edge work.
The exact model matters less than having a plane that can be adjusted properly and fitted with a sharp blade.
Know the Basic Parts of a Hand Plane
You do not need to memorize every component before making your first shaving, but knowing the major parts makes adjustment much easier.
Blade or Iron
The blade is the cutting edge that removes the wood. A dull or damaged blade is one of the most common reasons beginners struggle with a hand plane.
Sole
The sole is the flat bottom surface of the plane. It rides across the workpiece and helps keep the cutting action controlled.
Mouth
The opening in the sole where the blade protrudes is called the mouth. Wood shavings pass through this opening.
Depth Adjustment
The depth adjustment controls how far the blade projects beneath the sole. A very small change can make a significant difference in how aggressively the plane cuts.
Lateral Adjustment
The lateral adjustment allows you to correct the blade if one side is projecting farther than the other.
Front Knob and Rear Handle
These give you control over the plane while pushing it through the cut. For a typical bench plane, one hand guides the front while the other supplies controlled forward pressure from the rear.
For a deeper explanation of bench-plane anatomy and setup, Popular Woodworking’s hand-plane guide for beginners provides a useful additional reference.
Make Sure the Blade Is Sharp
A hand plane with a dull blade can make woodworking unnecessarily frustrating.
Instead of producing thin, continuous shavings, a dull blade may skip across the surface, require excessive force, tear the grain, or refuse to cut cleanly at all.
The blade should be sharp enough to slice wood fibers cleanly rather than crush or scrape them.
You do not need advanced sharpening equipment to understand the basic rule: if you must force the plane aggressively to make it cut, stop and check both the blade sharpness and blade adjustment.
Set the Hand Plane for a Light Cut
One of the biggest beginner mistakes is extending the blade too far.
Start with the blade retracted. Gradually advance it until the cutting edge barely projects below the sole.
Test the plane on a piece of scrap wood.
Your goal is a thin shaving rather than a thick chip. Once the plane begins cutting consistently, make very small adjustments if you need to remove slightly more material.
Taking several light passes gives you far more control than trying to remove too much wood with one aggressive pass.
Check That the Blade Is Even
Look carefully along the sole of the plane or make a few test passes on scrap wood.
If one side of the blade cuts noticeably deeper than the other, use the lateral adjustment to straighten the cutting edge.
A blade that projects unevenly can leave ridges or make the plane pull toward one side.
Secure the Wood Before Planing
Your workpiece should not slide around the bench while you are using the plane.
Secure it with a vise, bench dogs, clamps, or another appropriate workholding method. Make sure the clamps will not interfere with the path of the plane.
Good workholding improves both safety and accuracy because you can concentrate on guiding the tool instead of trying to hold the board still.
Learn to Read the Grain Before You Plane
Wood fibers generally run in a direction, and planing with that direction usually produces a cleaner surface.
When you plane against the grain, the blade can lift the fibers ahead of the cut and tear chunks from the surface. This is called tearout.
Look at the grain along the edge of the board. If the fibers appear to rise toward one end, try planing in the direction that follows those fibers rather than pushing underneath them.
If you begin getting tearout, stop and try the opposite direction before making additional passes.
Some boards contain reversing or difficult grain, so there will not always be one perfect direction across the entire surface. When that happens, use particularly light cuts.
How to Hold and Push a Hand Plane
When learning how to use a hand plane for beginners, proper hand position and steady body movement are just as important as blade adjustment. For a typical bench plane, place one hand on the rear handle and the other on the front knob.
Stand in a balanced position so you can push the plane forward without twisting your upper body awkwardly.
Begin the stroke with slightly more downward pressure toward the front of the plane. As the entire sole moves onto the board, keep the pressure balanced. Near the end of the stroke, allow more of the downward pressure to move toward the rear.
This helps prevent the plane from rocking over the ends of the board and accidentally rounding them.
Use your body to move the plane forward smoothly rather than relying only on your arms.
Take Long, Controlled Passes
Place the plane flat on the workpiece and push it forward in a smooth motion.
Do not rock the tool from side to side.
Listen and feel as the blade cuts. A properly adjusted plane should move with controlled resistance and produce thin shavings without requiring excessive force.
After each pass, inspect the board rather than automatically making dozens of additional strokes.
This is similar to the careful approach used when learning how to measure and cut wood accurately: remove only what you need because putting material back is considerably harder.
How to Smooth Wood With a Hand Plane
Smoothing is one of the easiest ways for beginners to practice.
Start with a board that is reasonably flat. Secure it to your workbench and identify the grain direction.
Set the blade for a very light shaving and make overlapping passes along the surface.
Watch for areas where the plane cuts and areas where it does not. High spots will often be contacted first.
Continue with light passes until the surface becomes consistent.
A hand plane and a sander do different jobs, and many projects benefit from both. Our guide to using a random orbital sander for beginners explains the sanding side of surface preparation.
How to Flatten High Spots
If a board has minor high spots, lightly mark the surface with a pencil and inspect it with a straightedge.
Concentrate your initial planing passes on the high areas instead of immediately planing the entire board from end to end.
Check the surface frequently.
Once the high areas approach the surrounding surface, transition to longer passes that blend everything together.
Hand planes can correct small irregularities extremely well, but severely twisted, cupped, or warped lumber may require more advanced flattening techniques.
How to Plane the Edge of a Board
A hand plane can also refine an edge after sawing.
Secure the board firmly with the edge accessible. Keep the sole of the plane flat against the edge and make light passes along the grain.
Periodically check the edge with a square.
If the edge begins leaning to one side, resist the temptation to keep planing blindly. Correct your hand position and selectively remove material from the high side.
Use a Hand Plane to Chamfer Sharp Corners
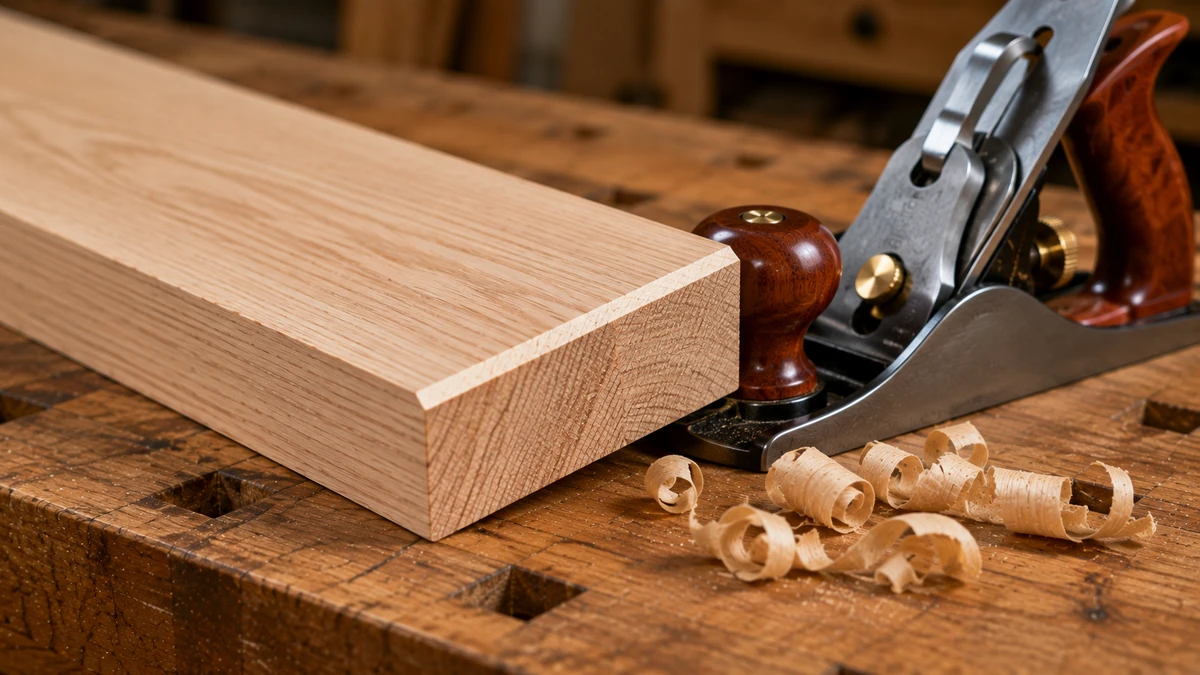
A small chamfer is simply a narrow angled surface created along a sharp edge.
Hold the plane at roughly 45 degrees to the corner and make a very light pass. Repeat until you achieve the size of chamfer you want.
This is an excellent beginner exercise because it helps develop control without requiring you to flatten an entire board.
Use a Hand Plane for Fine Fitting
A hand plane is especially valuable when a part is only slightly too large.
Instead of returning immediately to a saw, you can remove a few extremely thin shavings and test the fit again.
This kind of controlled adjustment becomes particularly useful as you begin building more projects and working with basic woodworking joints for beginners.
Chisels offer another level of fine control around joints, shoulders, recesses, and notches. If you have not already practiced with one, see our guide on how to use a wood chisel for beginners.
Common Hand Plane Problems for Beginners
The Plane Will Not Cut
Understanding the most common mistakes is an important part of learning how to use a hand plane for beginners, because small setup problems can make the tool feel much harder to control than it really is.
First check whether the blade is actually projecting beneath the sole. If it is, inspect the cutting edge for dullness.
Advance the blade only slightly. Extending it dramatically is rarely the correct solution.
The Plane Takes Huge Shavings
The blade is probably set too deep.
Retract it and begin again with a shallower cut.
The Plane Tears the Wood
You may be planing against the grain, the blade may be dull, or the cut may be too aggressive.
Try reversing your direction and reducing the blade depth.
The Plane Leaves Ridges
The blade may be projecting farther on one side than the other. Check the lateral adjustment.
The Plane Chatters or Skips
Confirm that the workpiece is secure, the plane is properly assembled, the blade is sharp, and the cutting depth is not excessive.
The Ends of the Board Become Rounded
You may be applying downward pressure incorrectly at the beginning or end of the stroke.
Keep the plane supported by the board and shift pressure gradually as the tool travels across the workpiece.
Hand Plane Safety Tips
A hand plane does not have a spinning blade, but its cutting iron is extremely sharp.
Keep your fingers away from the cutting edge whenever you inspect or adjust the tool.
Secure the workpiece before planing and keep your hands on the handles during the stroke.
Do not test the sharpness of the blade by casually running a finger along its cutting edge.
When the plane is not being used, place it where the blade cannot accidentally contact your hands or another tool.
Finally, keep the bench and floor around you clear enough that you can maintain a stable working position.
Practice on Scrap Wood First
Before touching an important project part, spend a few minutes planing scrap lumber.
Practice making the blade adjustment shallower and deeper. Try planing with and against the grain so you can see the difference. Practice making an edge chamfer. Watch how changing downward pressure affects the cut.
Those few minutes of experimentation will teach you more about your particular plane than making aggressive adjustments on a finished project.
Practicing how to use a hand plane for beginners on scrap wood gives you a safe way to learn blade depth, pressure, and grain direction before working on a project.
Hand Plane vs. Power Tools
A hand plane does not need to replace your power tools.
Its strength is precision.
A saw may get a board close to its final size. A router may create a particular profile. A sander can refine a surface. But when you need to remove just a tiny amount of material or gently improve a fit, a hand plane can provide tremendous control.
Learning both hand-tool and power-tool skills gives beginning woodworkers more options when solving problems at the workbench.
Build Your Skills With Real Projects
The best way to become comfortable with a hand plane is to use it while building something. Start with straightforward projects where you can practice smoothing edges, removing small high spots, chamfering corners, and improving the fit between parts.
Once you understand how to use a hand plane for beginners, simple projects give you repeated opportunities to practice smoothing, edge work, chamfering, and fine fitting.
If you are ready to put these skills into practice, you can explore woodworking plans and project ideas here. Working from a clear plan makes it much easier to understand where precise measuring, cutting, planing, sanding, and joinery fit into the overall building process.
Final Thoughts on How to Use a Hand Plane for Beginners
Learning how to use a hand plane for beginners comes down to a few fundamentals: use a sharp blade, secure your workpiece, read the grain, set the blade for a light cut, and make controlled passes.
Do not judge your progress by how much wood you can remove. Good hand-planing technique is about removing exactly as much material as necessary.
Once you learn what a thin, clean shaving feels like, the hand plane becomes much less mysterious. It turns into one of the most useful precision tools on the workbench—capable of smoothing a surface, correcting a high spot, refining an edge, chamfering a corner, or sneaking up on a perfect fit one shaving at a time.

