

A wood chisel is one of the simplest tools in a woodworking shop, but learning to control one well can dramatically improve the accuracy of your projects. A sharp chisel can trim a joint, clean up a notch, remove small amounts of waste, square a corner, and make adjustments that are difficult to achieve with many power tools.
Learning how to use a wood chisel for beginners starts with three fundamentals: keep the workpiece secure, keep your hands behind the cutting edge, and remove wood gradually instead of trying to force the chisel through too much material at once.
This guide explains the basic techniques you need to make controlled cuts, shallow notches, clean recesses, and simple joinery without damaging the workpiece or putting your hands in the path of the blade.
What Is a Wood Chisel?
A wood chisel is a hand tool with a sharpened steel blade attached to a handle. The cutting edge is formed by a flat back on one side of the blade and an angled bevel on the other.
Wood chisels are commonly used for:
- Cleaning up woodworking joints
- Trimming small amounts of wood
- Cutting shallow recesses and notches
- Squaring corners that a round router bit cannot reach
- Removing waste from joinery
- Fitting hinges and hardware
- Paring a surface to a layout line
If you are still assembling a basic workshop, our guide to essential woodworking tools for beginners explains where chisels fit into a practical starter tool collection.
How to Use a Wood Chisel for Beginners Safely
A chisel does not have a motor, but its cutting edge can be extremely sharp. Good chisel technique is largely about controlling where the blade will travel if it slips.
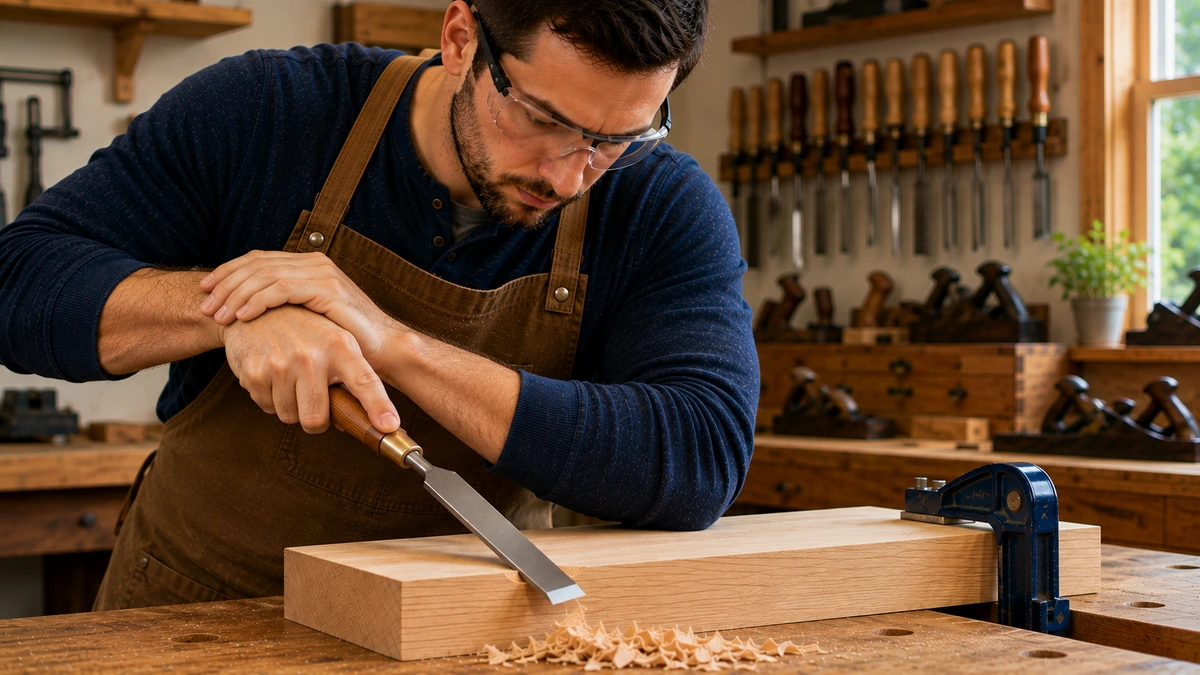
The most important rule is simple: never place a hand, finger, or other part of your body in front of the cutting edge.
Whenever possible, clamp the workpiece instead of holding it with your free hand. Position yourself so the chisel moves away from your body and away from anything you do not intend to cut.
For a broader overview of safe workshop habits, review our guide to beginner woodworking safety.
1. Start With a Sharp Chisel
A dull chisel may seem safer because the edge feels less aggressive, but the opposite is often true. A dull edge requires more force, which makes the tool harder to control.
A sharp chisel should cut wood fibers cleanly without requiring excessive pressure.
Before using a chisel, inspect:
- The cutting edge for chips or damage
- The bevel for obvious unevenness
- The back of the blade near the edge
- The handle for cracks or looseness
If the chisel is dull, sharpen or hone it before attempting precise work.
2. Choose the Right Chisel Size
Beginner woodworkers do not need a huge collection of chisels. A few common sizes can handle a wide range of woodworking jobs.
A narrower chisel is useful for small joints, corners, and detailed work. A wider chisel can make paring broad surfaces and trimming larger areas easier.
Choose a blade that fits comfortably inside the area you are trying to cut. Using a chisel that is wider than a narrow recess can damage the surrounding wood.
3. Understand the Bevel and Flat Back
The two sides of a chisel blade behave differently.
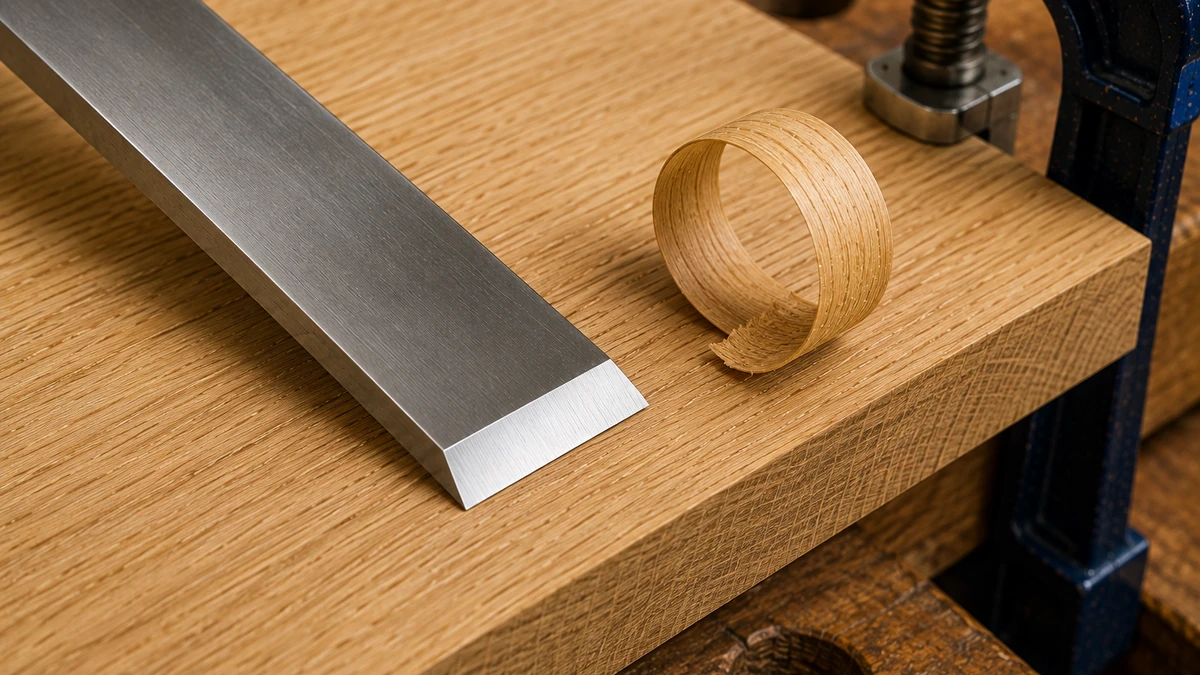
The flat back provides a reference surface. The bevel is the angled face that forms the cutting edge.
Understanding which side is against the workpiece helps you control the direction of the cut.
For many paring operations, placing the flat back against the surface you want to preserve can help produce a straighter, more controlled cut.
4. Secure the Workpiece
Before making a cut, place the workpiece on a stable bench and clamp it securely.
The board should not slide, tip, or rotate when pressure is applied.
Using clamps also keeps your free hand from becoming the work-holding device. That is especially important when the chisel is pointed toward an edge or corner.
Position the clamps so they do not interfere with the chisel or your hands.
5. Mark the Area Before Cutting
Accurate chisel work usually begins with accurate layout.
Use a pencil, marking knife, or other appropriate layout tool to define the material that needs to be removed.
A clear layout line gives you a visual stopping point and makes it easier to remove wood gradually.
If layout and measurement are still challenging, our guide to measuring and cutting wood accurately covers several useful beginner habits.
6. Use Two-Handed Control for Paring Cuts
A paring cut removes thin slices of wood without striking the chisel with a mallet.
For controlled paring, use one hand to guide the blade while the other supplies gentle forward pressure from behind the cutting edge.
Keep both hands behind the sharp edge.
Take very thin cuts. A chisel is easier to control when it is shaving wood rather than trying to remove a large chunk in one pass.
7. Work With the Grain When Possible
Wood fibers have direction, and a chisel can behave very differently depending on how the grain runs.
When possible, make cuts that allow the blade to slice cleanly through the fibers rather than lifting and tearing them ahead of the edge.
If the wood begins splitting farther than you intend, stop and reassess the direction of the cut.
Sometimes reversing the workpiece or approaching the area from the opposite direction provides better control.
Different species also behave differently under a chisel. If you are still learning about material selection, see our guide to choosing the right wood for beginner woodworking projects.
8. Use a Mallet for Controlled Chopping
Some chisel operations require more force than hand pressure alone can provide. In those situations, a woodworking mallet can be used to drive an appropriate chisel into the wood.
Use controlled taps rather than striking as hard as possible.
The goal is to remove small amounts of waste while keeping the blade within the layout lines.
When using a mallet:
- Keep your non-striking hand safely behind the cutting edge
- Make sure the workpiece is clamped
- Use eye protection
- Strike the handle squarely
- Remove waste gradually
Not every chisel is designed for heavy chopping. Follow the manufacturer’s guidance for the particular tool you are using.
9. Cut a Shallow Notch in Stages
A common beginner chisel task is creating or cleaning a shallow notch.
Do not try to remove the entire notch in one cut.
Instead:
- Mark the boundaries of the notch.
- Secure the workpiece.
- Make shallow cuts inside the waste area.
- Remove thin layers of material gradually.
- Stop before reaching the final depth.
- Use lighter paring cuts to bring the surface to the layout line.
This staged approach gives you much more control and reduces the chance of splitting beyond the intended area.
10. Approach Final Layout Lines Carefully
Most mistakes happen when too much material is removed near the finished surface.
Leave a small amount of waste during the rough cutting stage.
Then switch to lighter, more controlled cuts as you approach the final line.
A sharp chisel can remove extremely thin shavings, which makes it ideal for fine fitting.
11. Clean Up Woodworking Joints
Chisels are especially valuable for correcting and refining joinery.
They can remove small ridges, square corners, trim shoulders, and clean waste from areas that other tools cannot reach easily.
If you are learning how different woodworking connections are constructed, our guide to woodworking joints for beginners explains several common joint types.
A chisel is also useful when preparing mating surfaces before glue-up. For adhesive technique, see our wood glue for beginners guide.
12. Do Not Use a Chisel as a Pry Bar
A woodworking chisel is designed primarily for cutting.
Using a thin bevel-edge chisel to aggressively pry apart wood or lever heavy waste can damage the cutting edge or even the blade.
If a task requires heavy levering, use a tool designed for that purpose or remove the waste using a safer sequence of cuts.
13. Avoid Cutting Too Deeply at Once
Beginners often assume that a deeper cut will simply finish the job faster.
In practice, deep cuts are harder to control and more likely to follow the grain in an unwanted direction.
Use several shallow cuts instead.
This is particularly important near the edge of a board, where an aggressive cut can split off material beyond the layout line.
14. Protect the Chisel Edge Between Uses
Do not toss a sharp chisel into a drawer where the cutting edge can strike other metal tools.
Use an edge guard, tool rack, roll, or other storage method that protects both the blade and your hands.
A damaged edge requires more sharpening and performs poorly during precise work.
15. Learn Basic Honing and Sharpening
You do not need to become a sharpening expert before using a chisel, but you should understand that edge maintenance is part of owning the tool.
The chisel’s back and bevel work together to form the cutting edge. Honing restores sharpness after normal use, while more significant damage may require additional sharpening work.
A properly maintained edge makes paring cuts cleaner and requires less force.
Common Wood Chisel Mistakes Beginners Should Avoid
Most beginner chisel problems come from excessive force, poor work holding, or placing a hand in the wrong location.
- Putting a hand in front of the blade: Always keep hands behind the cutting edge.
- Working on unsecured wood: Clamp the workpiece whenever practical.
- Using a dull chisel: A dull edge requires unnecessary force.
- Removing too much wood at once: Take shallow, controlled cuts.
- Ignoring grain direction: Stop if the wood begins splitting ahead of the cut.
- Using the wrong chisel size: Choose a blade that fits the work.
- Prying aggressively: Do not treat a thin woodworking chisel like a pry bar.
- Rushing the final cut: Approach layout lines with light paring cuts.
Wood Chisel Safety Tips
- Keep all hands and fingers behind the cutting edge.
- Clamp the workpiece instead of holding it in the blade path.
- Cut away from your body.
- Wear eye protection when chopping or striking a chisel.
- Do not use a damaged chisel.
- Use controlled mallet blows instead of excessive force.
- Keep the chisel sharp.
- Protect the edge when the tool is stored.
- Follow the manufacturer’s recommendations for your specific chisel.
Popular Woodworking provides a useful basic guide to chisels that covers common chisel types and fundamental techniques such as paring and cutting.
Practice on Scrap Wood First
Chisel control improves quickly with practice.
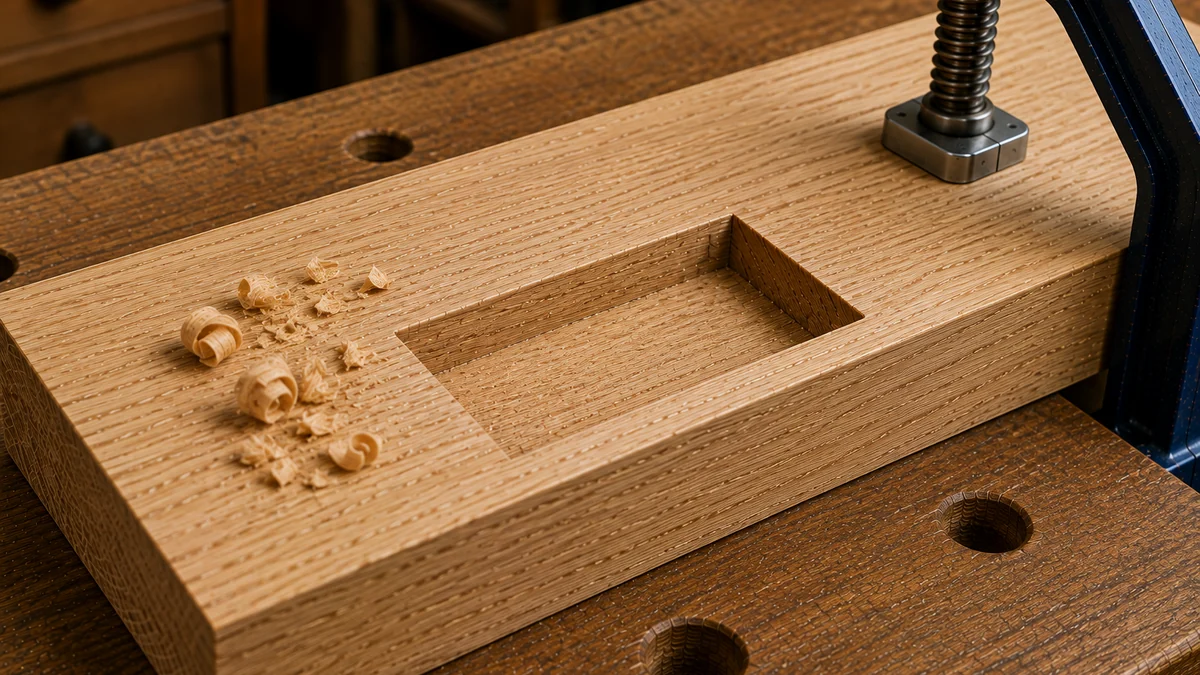
Before attempting precise work on an important project, clamp a piece of scrap wood to your bench and practice:
- Making thin paring cuts
- Following a layout line
- Working from different grain directions
- Using light mallet taps
- Creating shallow recesses
- Cleaning the bottom of a notch
Scrap wood lets you learn how the blade behaves without worrying about damaging a finished project.
If you want additional projects where you can practice measuring, cutting, drilling, joinery, and hand-tool skills, you can explore woodworking plans and project ideas here.
Final Thoughts
Learning how to use a wood chisel for beginners is less about strength and more about control. Secure the workpiece, use a sharp edge, keep your hands behind the blade, remove material gradually, and pay attention to grain direction.
Once those habits become natural, a chisel becomes far more than a tool for rough chopping. It becomes a precision tool for fitting joints, trimming surfaces, creating clean recesses, and correcting small imperfections throughout a woodworking project.
Practice on scrap wood first, make light cuts, and let the sharp edge do the work.

