
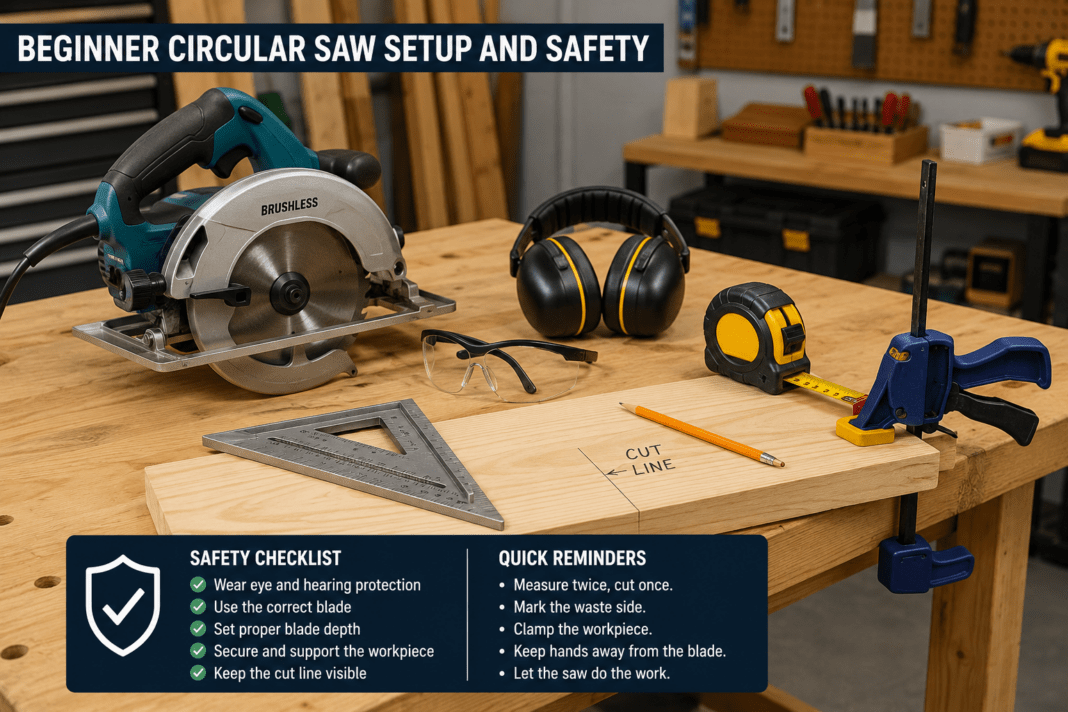
A circular saw can look intimidating when you are new to woodworking, but it is one of the most useful power tools you can learn to use. With the right setup, a stable workpiece, and a few basic habits, you can make clean, straight cuts without needing a large workshop or expensive stationary saw.
This beginner’s guide explains how to use a circular saw safely and confidently, from checking the saw and setting the blade depth to making straight crosscuts and rip cuts. The goal is not speed. The goal is learning a repeatable process that gives you control over the tool and better results from every cut.
Important: Always read and follow the instructions and safety warnings supplied with your specific circular saw. Models vary, and the manufacturer’s manual should take priority over general woodworking advice.
What Is a Circular Saw?
A circular saw is a handheld power saw that uses a round, toothed blade to cut through wood and other materials. For beginner woodworking, it is especially useful for cutting dimensional lumber, plywood, shelving, and sheet goods.
Unlike a miter saw or table saw, the circular saw moves across the workpiece while the wood stays supported in place. That makes it useful when you are working with large boards or sheets that would be difficult to move through a stationary machine.
Most beginner woodworking projects only require a few basic types of circular-saw cuts:
- Crosscuts: cutting across the width of a board to shorten it.
- Rip cuts: cutting lengthwise with the grain to make a board or panel narrower.
- Bevel cuts: tilting the blade to produce an angled edge.
If you are still building your first workshop, a circular saw can handle a surprising amount of basic cutting before you ever need more specialized equipment.
What You Need Before Making Your First Cut
You do not need a complicated setup, but you do need the right basic equipment and enough room to work safely.
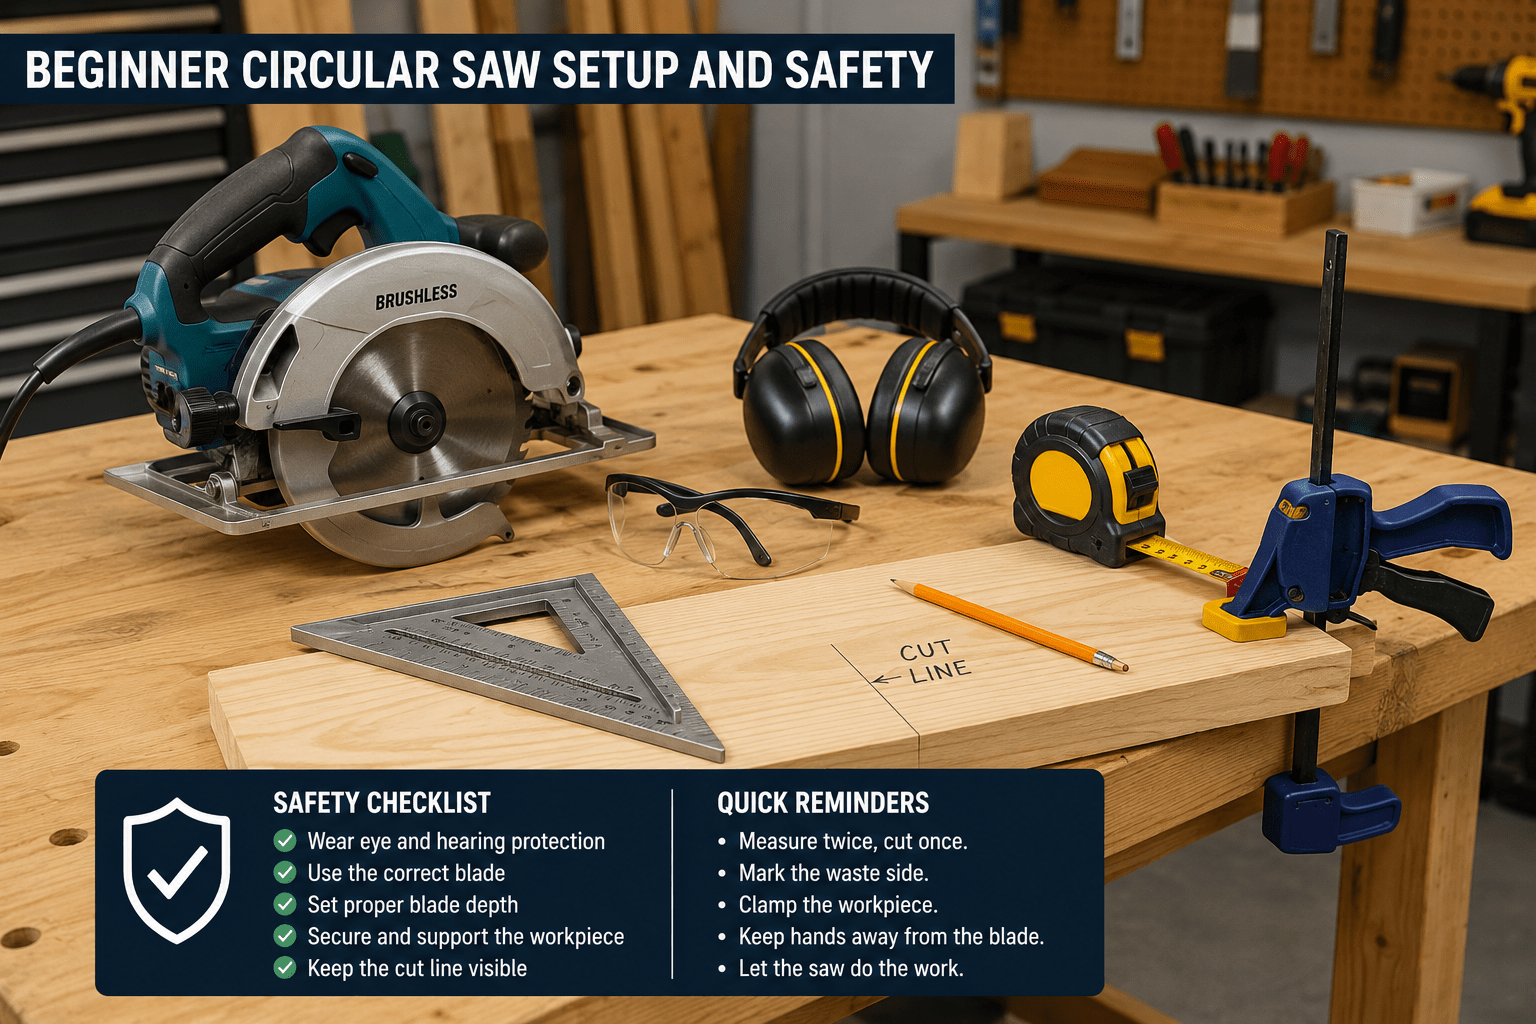
- Circular saw
- Correct blade for the saw and material
- Safety glasses or eye protection
- Hearing protection
- Dust protection when appropriate for the material and environment
- Tape measure
- Pencil or marking tool
- Speed square or combination square
- Straightedge or saw guide for longer cuts
- Clamps
- Stable work surface or properly positioned supports
Do not begin a cut until the workpiece is stable. A board that shifts, rocks, sags, or pinches the blade can ruin the cut and create a dangerous situation.
Step 1: Inspect the Circular Saw
Before plugging in a corded saw or installing the battery on a cordless saw, give the tool a quick inspection.
Check that the blade is appropriate for the material, properly installed, and free from visible damage. Make sure the lower blade guard moves freely and returns to its closed position. Check the power cord, battery, base plate, handles, adjustment levers, and other visible components for damage or looseness.
If anything appears damaged or does not operate normally, do not use the saw until the problem has been corrected.
Any time you change the blade or make an adjustment that places your hands near the blade, disconnect the saw from power or remove the battery first.
Step 2: Set the Blade Depth
One of the most important beginner adjustments is blade depth.
With the saw disconnected from power, place the base of the saw against the workpiece and adjust the cutting depth according to your saw manufacturer’s instructions. You generally want only the necessary amount of blade extending beneath the material rather than exposing far more blade than the cut requires.
Once the depth is set, securely tighten the adjustment lever before operating the saw.
Excessive blade exposure does not improve the cut. Proper depth helps give you better control and reduces unnecessary blade exposure beneath the workpiece.
Step 3: Measure and Mark the Cut
Accuracy begins before the saw ever starts.
Measure the board carefully and make a clear pencil mark at the desired length. Use a square to extend that mark across the face of the board for a 90-degree crosscut.
Before cutting, determine which side of the line is your finished piece and which side is waste. The circular-saw blade removes a narrow strip of material called the kerf, so cutting directly through the wrong part of your mark can leave the finished piece slightly short.
A simple beginner habit is to mark the waste side with a small X. Then position the blade so the kerf falls on the waste side of your line.
Step 4: Support the Workpiece Correctly
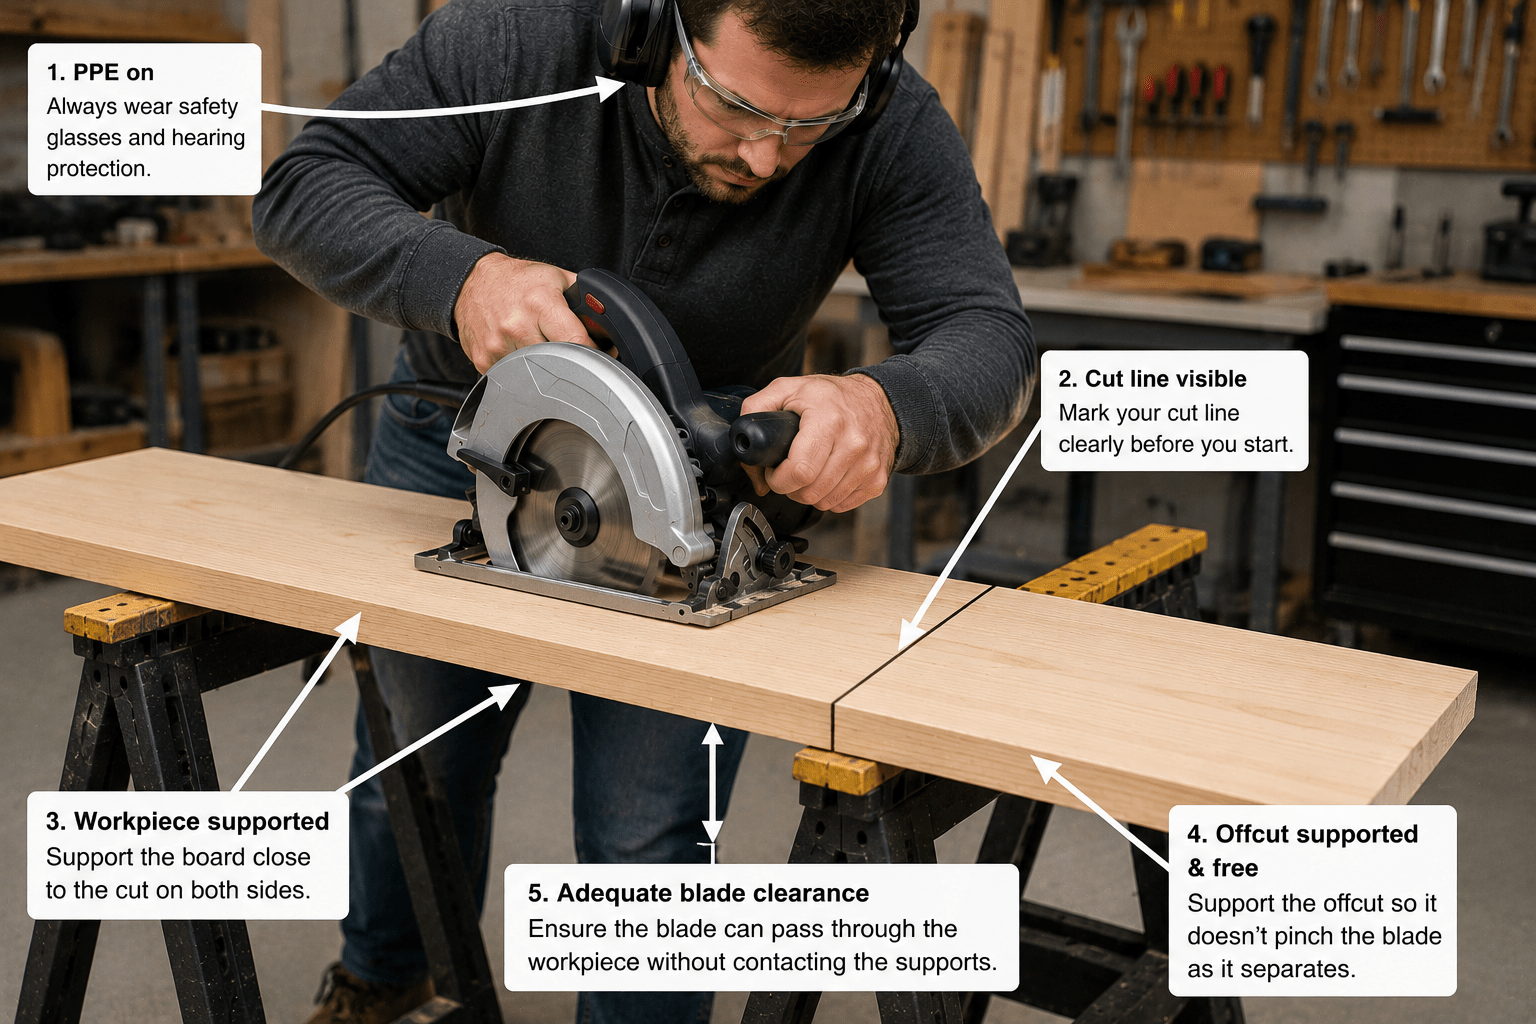
Proper support is essential because the blade needs a clear path through the material without striking your workbench or supports.
At the same time, both the finished piece and the offcut need enough support that the wood does not sag and close around the blade during the cut.
For boards, use a stable workbench, sawhorses, or suitable supports and clamp the workpiece when necessary. For large panels such as plywood, support the sheet so it remains stable throughout the entire cut.
Pay particular attention to the offcut. If it drops or twists before the cut is complete, it can pinch the blade.
Step 5: Position Yourself and the Saw
Before pulling the trigger, rehearse the movement with the saw switched off.
Make sure you can comfortably reach the end of the cut without stretching, losing your balance, or changing your grip. Keep the power cord, if your saw has one, away from the blade path.
Place the front of the saw’s base plate flat on the workpiece while keeping the blade clear of the wood. Align the blade or the appropriate guide mark on the base with your cut line.
Use a firm, balanced grip and keep your hands away from the blade area. Whenever your saw is designed for two-handed operation, use the primary handle and front handle as instructed by the manufacturer.
Step 6: Start the Saw Before Entering the Wood
With the blade clear of the workpiece, start the saw and allow the blade to reach normal operating speed.
Then guide the saw forward into the wood at a smooth, controlled pace.
Do not force the saw. A properly set up saw with a suitable, sharp blade should be allowed to do the cutting. Pushing excessively hard can make it more difficult to follow the line and may contribute to binding.
Keep the base plate flat against the workpiece throughout the cut.
Step 7: Follow the Cut Line
For a short crosscut, you may be able to follow your pencil line freehand once you have developed some control. However, beginners usually get better results with a guide.
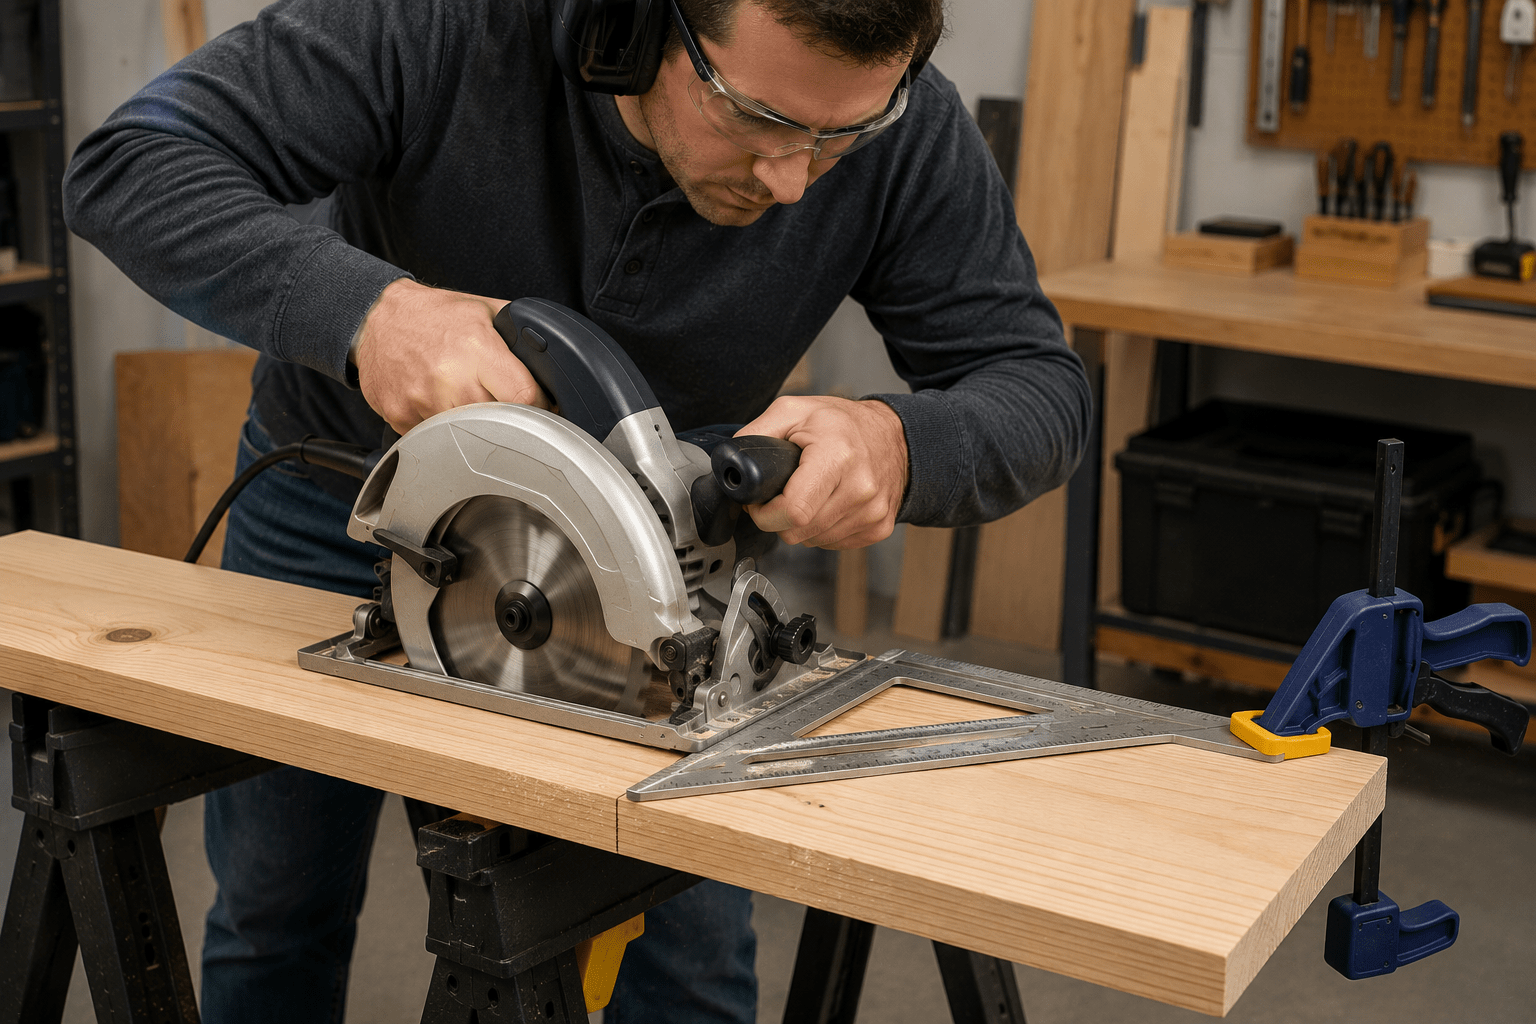
A speed square can make an excellent guide for many short 90-degree crosscuts. Hold or clamp the square securely against the board and run the edge of the saw’s base plate along it.
For long cuts, clamp a straightedge or suitable saw guide to the workpiece. The base plate then follows the guide, helping prevent the saw from wandering away from the line.
How to Make a Straight Crosscut
A crosscut shortens a board by cutting across its width. This is one of the first circular-saw skills worth practicing.
- Measure and mark the desired length.
- Use a square to draw a clear 90-degree cut line.
- Mark the waste side.
- Support and secure the board.
- Position a speed square or other guide if desired.
- Set the saw base flat against the board with the blade clear.
- Start the saw and allow it to reach operating speed.
- Guide the saw smoothly across the board.
- Continue through the end of the cut without twisting the saw.
- Release the trigger and allow the blade to stop before setting the saw down.
Practice this process on scrap lumber before using it on a project piece. A few deliberate practice cuts can improve your control quickly.
How to Make a Straight Rip Cut
A rip cut runs along the length of the material. Because the distance is longer, maintaining a straight line by eye is much more difficult.
For beginners, use a clamped straightedge, compatible edge guide, or other appropriate guide whenever practical.
- Measure the desired width at more than one point.
- Mark the cut line clearly.
- Position the guide at the correct offset for your saw’s base plate.
- Clamp the guide securely.
- Verify that the workpiece and offcut are adequately supported.
- Make a dry run with the saw switched off to ensure the cord, clamps, and supports will not interfere.
- Start the saw with the blade clear of the wood.
- Keep the base plate against the guide and move forward steadily.
- Finish the cut without turning or twisting the saw.
If you are learning on expensive plywood, practice setting up the guide on scrap first. Once you know the distance between your blade and the edge of the saw’s base plate, positioning a straightedge becomes much easier.
Understanding Circular Saw Kickback
Kickback is one of the most important circular-saw hazards to understand. It can occur when the blade becomes pinched, bound, or misaligned in the cut and the saw reacts suddenly.
You can reduce the chance of kickback by developing good setup habits:
- Support the material so the kerf does not close around the blade.
- Keep the saw moving straight rather than twisting it in the cut.
- Use the correct blade for the material.
- Do not use a damaged or excessively dull blade.
- Secure blade-depth and bevel adjustments before cutting.
- Keep the saw’s base plate flat against the workpiece.
- Do not reach behind the saw blade while making a cut.
- If the blade binds, release the trigger and keep the saw still until the blade has completely stopped.
Trying to force a saw through a bad cut usually makes the situation worse. Stop, determine why the blade is binding, and correct the setup before continuing.
Common Circular Saw Mistakes Beginners Should Avoid
Cutting Unsupported Wood
If the workpiece moves while you are cutting, accuracy and safety both suffer. Take the extra time to support the material properly before starting.
Watching Only the Blade
Beginners often focus so intensely on the spinning blade that they lose awareness of their stance, cord location, clamps, supports, or the end of the cut. Check the entire cutting path before starting.
Forcing the Saw
More pressure does not automatically make a better or faster cut. Keep a controlled feed rate and let the blade do the work.
Trying to Correct a Wandering Cut by Twisting
If you wander noticeably away from the line, do not aggressively twist the saw sideways while the blade is spinning in the kerf. Stop safely and reassess the cut instead.
Setting the Blade Too Deep
Using far more blade depth than necessary creates unnecessary exposure below the workpiece. Set the depth correctly before each type of cut.
Ignoring the Offcut
The piece you are not keeping still matters. If the offcut falls, twists, or squeezes the blade before the cut is complete, it can affect the saw immediately.
How to Get Straighter, Cleaner Circular Saw Cuts
Once you are comfortable operating the saw, accuracy becomes much easier to improve.
- Use a guide. A straightedge removes much of the guesswork from longer cuts.
- Mark precisely. Thin, clear layout lines make it easier to position the blade correctly.
- Know your kerf. Always identify the finished side and waste side before cutting.
- Use a suitable blade. Blade design and condition influence cut quality.
- Keep the base flat. Tilting the saw while cutting can produce an inaccurate or rough edge.
- Practice on scrap. Learn how your particular saw starts, tracks, and stops before working on important material.
Good woodworking is built on repeatable habits. A careful measurement, a square line, proper support, and a guide will usually do more for your accuracy than trying to steer the saw perfectly by eye.
What to Practice First
If you have never used a circular saw before, do not begin with a complicated furniture project. Use scrap lumber and practice a small group of basic skills:
- Setting the blade depth.
- Marking the waste side of a cut.
- Making a guided 90-degree crosscut.
- Making several pieces the same length.
- Using a straightedge for a longer cut.
- Stopping immediately if the saw begins to bind or wander.
The objective is consistency. When you can repeat the same setup and make predictable cuts, the circular saw becomes much less intimidating.
Turning Accurate Cuts Into Woodworking Projects
Learning to cut wood accurately opens the door to many beginner projects. Once your pieces are square and correctly sized, assembly becomes much easier.
Your next skills can include learning how different pieces fit together with basic woodworking joints, how to drill straight holes in wood, and how to glue and clamp wood properly.
Those skills work together. Accurate cutting gives you properly sized parts, drilling lets you create clean fastening points, joinery determines how the pieces connect, and correct gluing helps keep the finished assembly together.
Looking for a project to put those skills into practice? Browse our woodworking plans and project ideas to find a build you can work toward as your confidence grows.
Circular Saw Safety Checklist Before Every Cut
Before pulling the trigger, make this quick mental check:
- Is the blade appropriate, secure, and in good condition?
- Is the lower guard operating normally?
- Is the blade depth properly set and locked?
- Are you wearing appropriate eye and hearing protection?
- Is the workpiece stable and adequately supported?
- Can the blade pass completely through the material without hitting a support?
- Is the offcut free to separate without pinching the blade?
- Are the power cord, clamps, and other objects clear of the cutting path?
- Can you complete the entire cut without reaching, leaning, or losing your balance?
- Do you know which side of the line is waste?
If one of those answers is no, correct it before starting the saw.
Final Thoughts
A circular saw is not a tool you need to rush. Confidence comes from knowing exactly what you are going to do before the blade starts moving.
Inspect the saw, set the depth, measure carefully, support the wood, use a guide when needed, and let the blade move through the material at a controlled pace. Those simple habits will give you safer, straighter, and more predictable cuts.
Once those fundamentals feel natural, you will have one of the most useful beginner woodworking skills in your toolkit—and you will be ready to use it on real projects.
Ready to start building? Explore our beginner-friendly woodworking plans and choose a project that gives you a reason to put your new cutting skills to work.

