
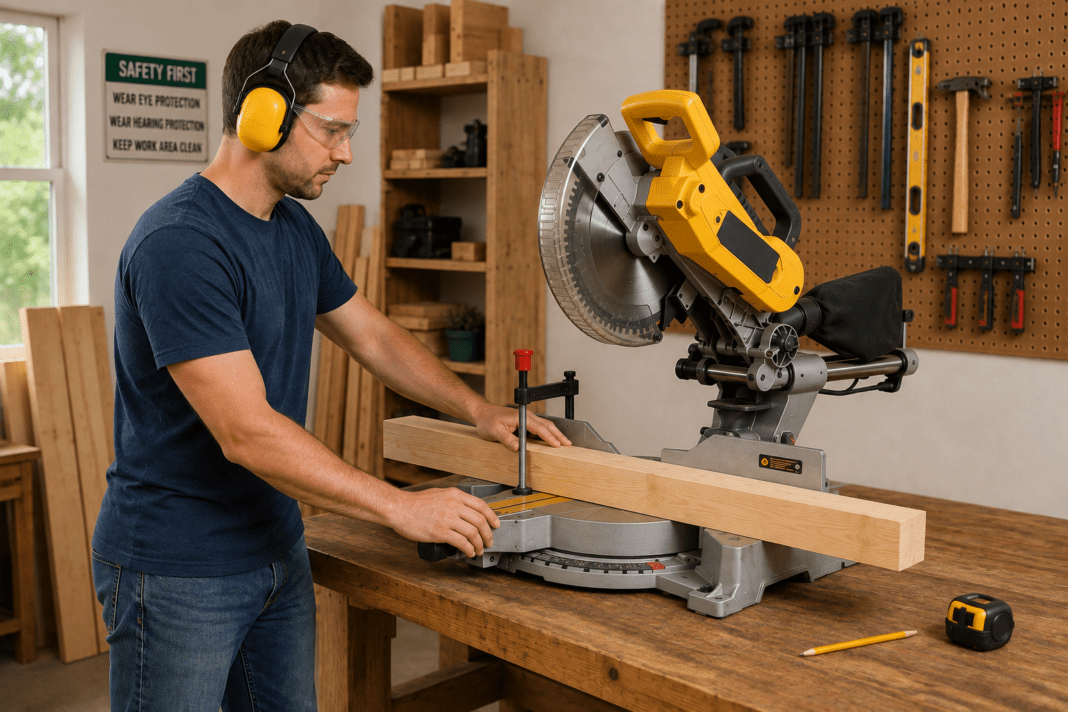
Learning how to use a miter saw for beginners starts with understanding the tool, setting up the workpiece correctly, and following a safe cutting routine. The exposed blade is large, the motor is powerful, and the saw moves toward the wood instead of the wood moving through the saw. But once you understand the basic controls and develop a safe cutting routine, a miter saw can become one of the easiest tools in a beginner workshop to use accurately.
The key is not speed. It is learning how to position the wood, support it properly, keep your hands safely away from the blade, and let the saw do the cutting.
In this beginner guide, you will learn how to use a miter saw safely and accurately, including how to make straight crosscuts, angled miter cuts, and bevel cuts. We will also cover common mistakes, cleaner-cutting techniques, and when a miter saw is a better choice than a circular saw or jigsaw.
Important: Miter saw designs vary. Always read and follow the operating and safety instructions supplied with your specific saw before using it.
What Is a Miter Saw Used For?
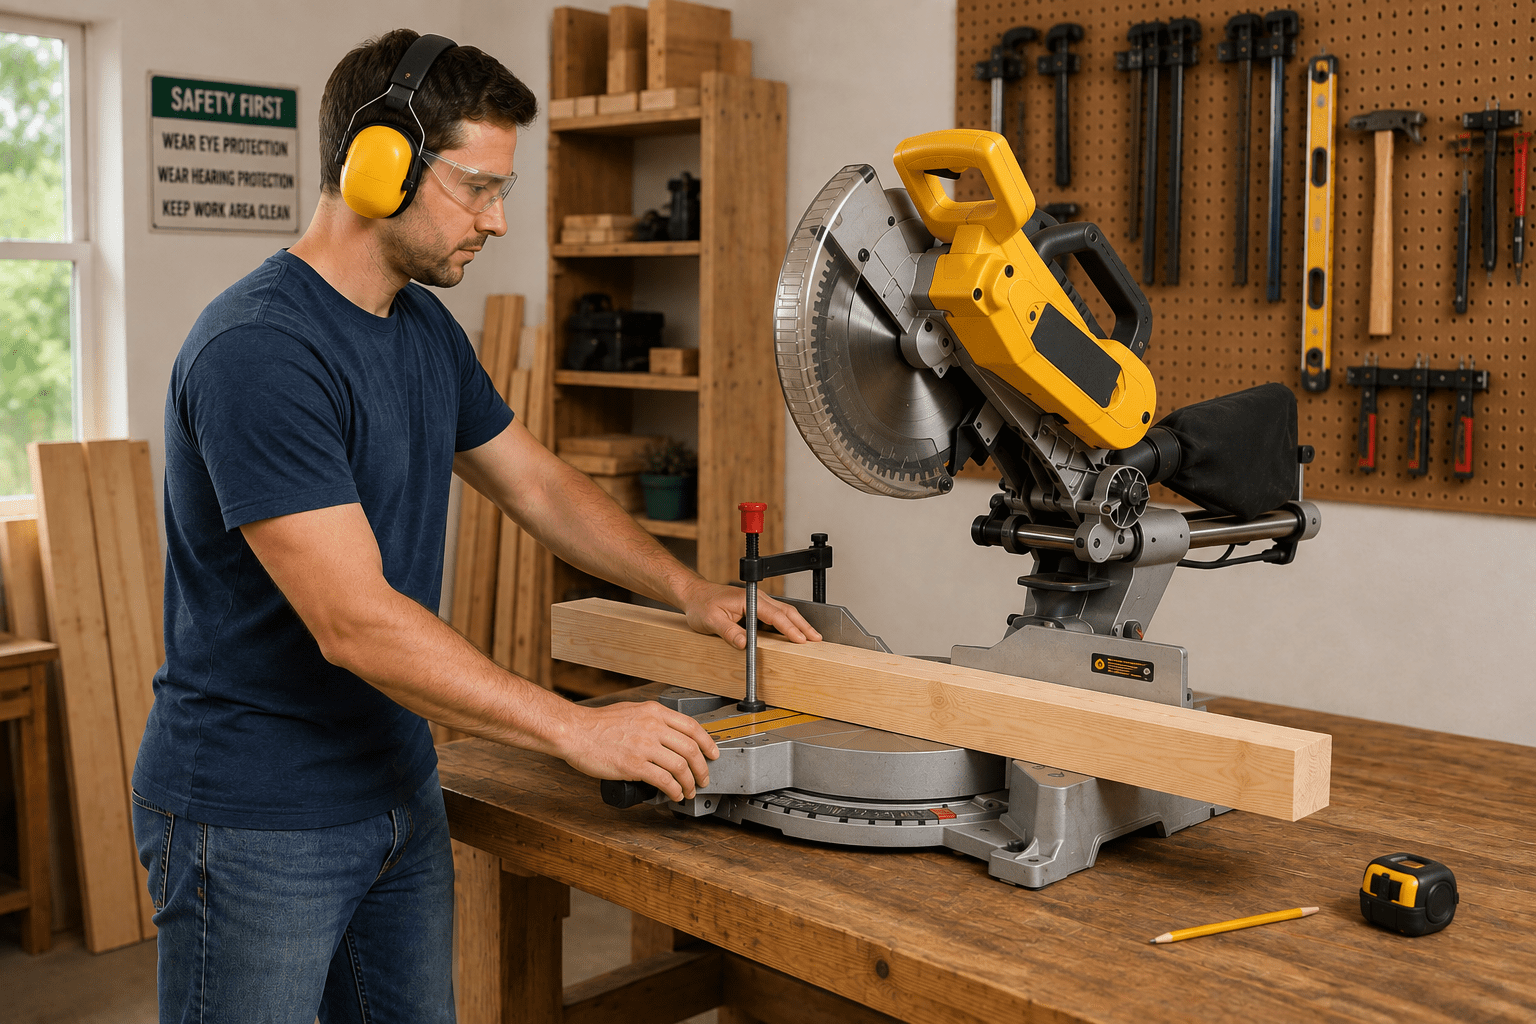
A miter saw is designed primarily for making controlled cuts across a board rather than cutting along its length. Because the blade and cutting head are mounted to the saw, you can position the workpiece against the fence, set the desired angle, and lower the blade through the wood.
Common miter saw jobs include:
- Cutting boards to finished length
- Making square 90-degree crosscuts
- Cutting 45-degree angles for frames and trim
- Making other angled miter cuts
- Making bevel cuts
- Cutting molding and trim
- Preparing pieces for furniture and woodworking projects
- Making repeatable cuts when several pieces need the same length
A miter saw is especially useful when accuracy and repeatability matter. Instead of guiding a handheld saw along a line, the workpiece stays supported while the saw follows its controlled cutting path.
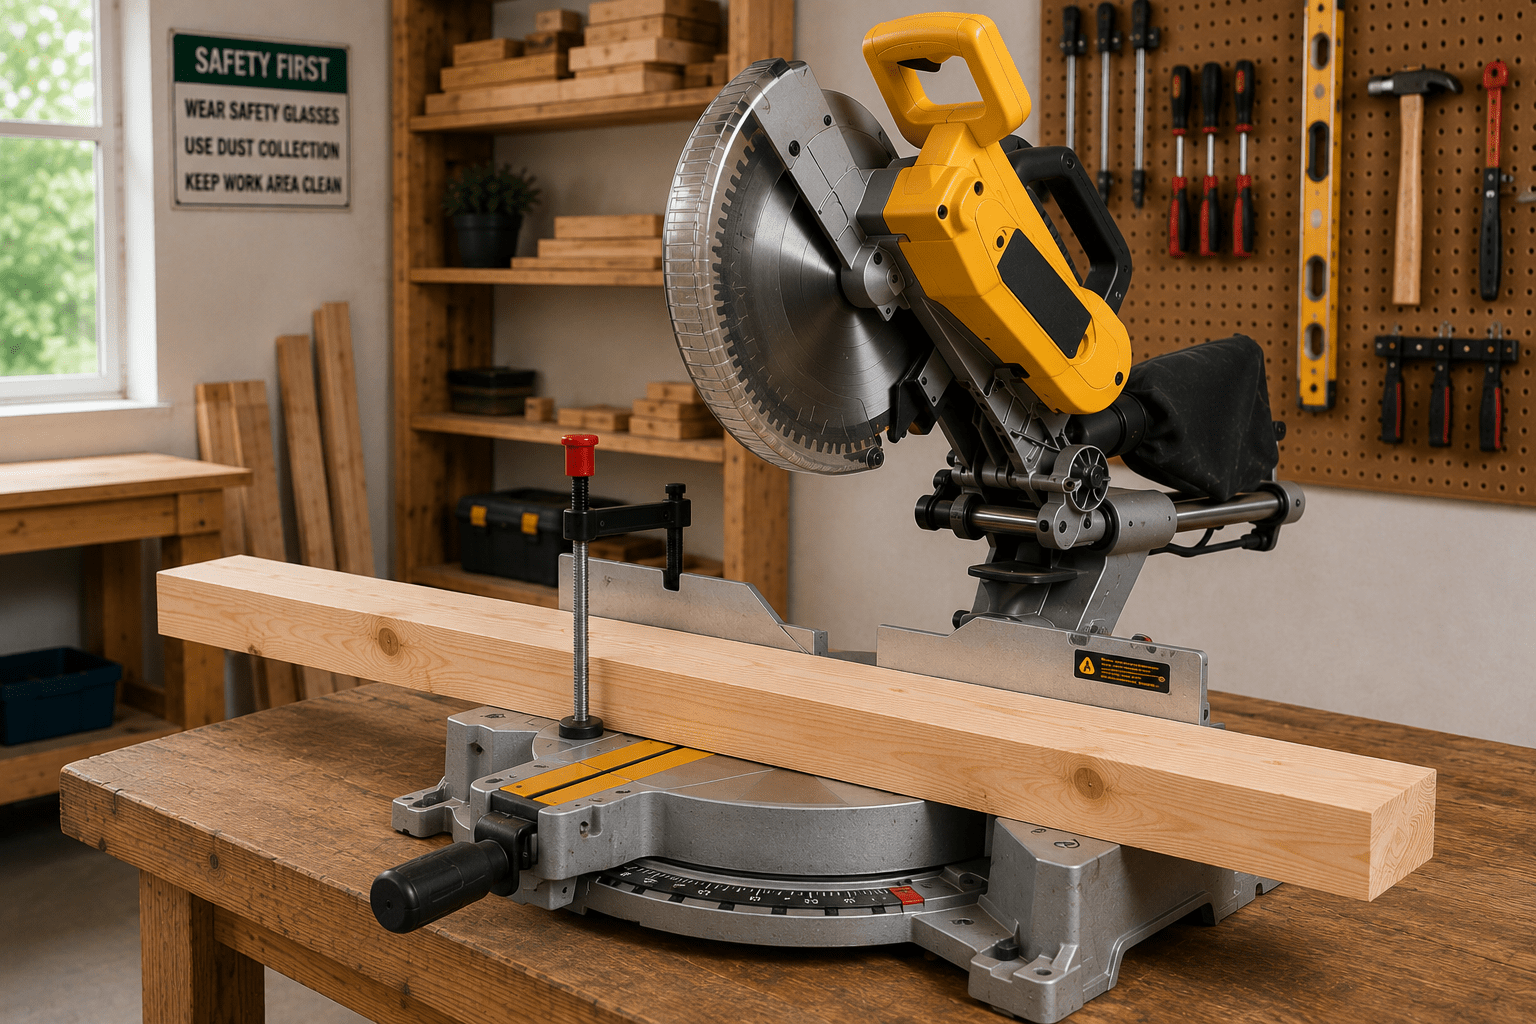
Parts of a Miter Saw Beginners Should Know
You do not need to memorize every component before making your first cut, but you should understand the parts that directly affect setup, accuracy, and safety.
Blade
The circular blade performs the actual cutting. Different blade sizes and tooth configurations are available for different saws and materials. Use only blades approved for your particular saw and application.
Blade Guard
The blade guard covers much of the blade when the saw is raised and normally retracts as the cutting head is lowered. Never defeat, remove, or intentionally hold the guard out of the way during normal cutting.
Fence
The fence is the vertical surface behind the workpiece. For most normal cuts, the board should sit firmly against the fence so it cannot rotate or shift as the blade enters it.
Saw Table
The table supports the bottom of the workpiece. Long boards may need additional support beyond the edges of the saw table so they remain stable and level.
Miter Scale and Lock
The miter adjustment rotates the saw table left or right. This is what lets you change from a square crosscut to an angled miter cut.
Bevel Adjustment
The bevel adjustment tilts the cutting head so the blade cuts through the board at an angle relative to its face.
Handle and Trigger
The handle controls the cutting head, while the trigger starts the motor. Some saws also have additional trigger locks or safety switches.
Workpiece Clamp
Many miter saws include or accept a clamp that helps secure the board. A properly secured workpiece is especially important when a piece is small, awkwardly shaped, or difficult to keep stable.
Before You Make Your First Cut
A good cut begins before the motor starts. Taking a few extra seconds to prepare the saw and workpiece can improve both safety and accuracy.
Set the Saw on a Stable Surface
The saw should sit securely on a stable workbench, miter saw stand, or other suitable support. It should not rock, slide, or shift when the cutting head is moved.
Inspect the Saw and Blade
Before use, check that the saw appears to be in proper working condition, the guard moves correctly, and the blade is appropriate for the material being cut. Do not use a damaged blade or a saw with a malfunctioning safety component.
Clear the Cutting Area
Remove loose scraps, tools, fasteners, cords, and other objects that could interfere with the workpiece or cutting head.
Wear Appropriate Protection
Use eye protection and appropriate hearing protection when operating a miter saw. Avoid loose clothing, jewelry, or anything else that could move toward the blade.
Disconnect Power Before Adjustments That Require It
For blade changes, maintenance, or other operations where accidental startup could expose you to the blade, disconnect the saw from its power source and follow the manufacturer’s instructions.
Plan Where Your Hands Will Go
Before pulling the trigger, decide how you will support the workpiece while keeping your hands well outside the blade path and the saw manufacturer’s designated no-hands zone. Never reach across the blade path.
How to Use a Miter Saw for Beginners: Step by Step
Once your saw and workspace are ready, use the same basic sequence for each cut. Developing a repeatable routine helps prevent rushed decisions.
1. Measure and Mark the Wood
Measure the piece carefully and mark the location of the cut with a sharp pencil. Make sure you know which side of the mark is the finished piece and which side is waste.
For better accuracy, use a square to extend the mark across the face of the board when appropriate.
2. Place the Board Flat Against the Table and Fence
Set the workpiece on the saw table with its back edge firmly against the fence. The board should not rock or sit on top of sawdust or scraps.
If the board is long, support the overhanging portion so the material remains level instead of tipping downward.
3. Set the Required Angle
For a basic crosscut, the miter setting is normally positioned at 0 degrees. For an angled cut, unlock the miter adjustment, rotate the table to the required angle, and securely lock it again.
If you need a bevel, use the saw’s bevel adjustment according to the manufacturer’s instructions and confirm that it is locked before cutting.
4. Secure the Workpiece
Make sure the board is stable and properly supported. Use the saw’s workpiece clamp when appropriate, particularly when the material cannot otherwise be held safely and securely outside the blade area.
Do not attempt to cut a piece that is too small to position and secure safely.
5. Check the Blade Position Before Starting
With the saw turned off, lower the cutting head enough to visually check where the blade will meet the workpiece, without contacting the wood if your saw’s instructions call for clearance.
This helps you confirm which side of your pencil line the blade will remove.
6. Return the Saw to the Starting Position
Raise the cutting head and make sure your hands are safely positioned. Recheck the workpiece, fence contact, angle setting, and cutting path.
7. Start the Saw
Hold the operating handle securely and start the motor. Allow the blade to reach normal operating speed before bringing it into the workpiece.
8. Make the Cut Smoothly
Lower the blade into the wood using a controlled motion. Do not force the blade through the material. Let the blade cut at a steady pace.
With a sliding miter saw, the cutting movement may differ from a non-sliding saw. Follow the operating sequence specified by the manufacturer of your saw rather than assuming every sliding saw works exactly the same way.
9. Finish the Cut Before Raising the Blade
After the blade passes completely through the workpiece, release the trigger while maintaining control of the cutting head. Allow the blade to stop as directed by your saw’s operating instructions before returning the head to its raised position or removing cut pieces.
How to Make a Straight Crosscut
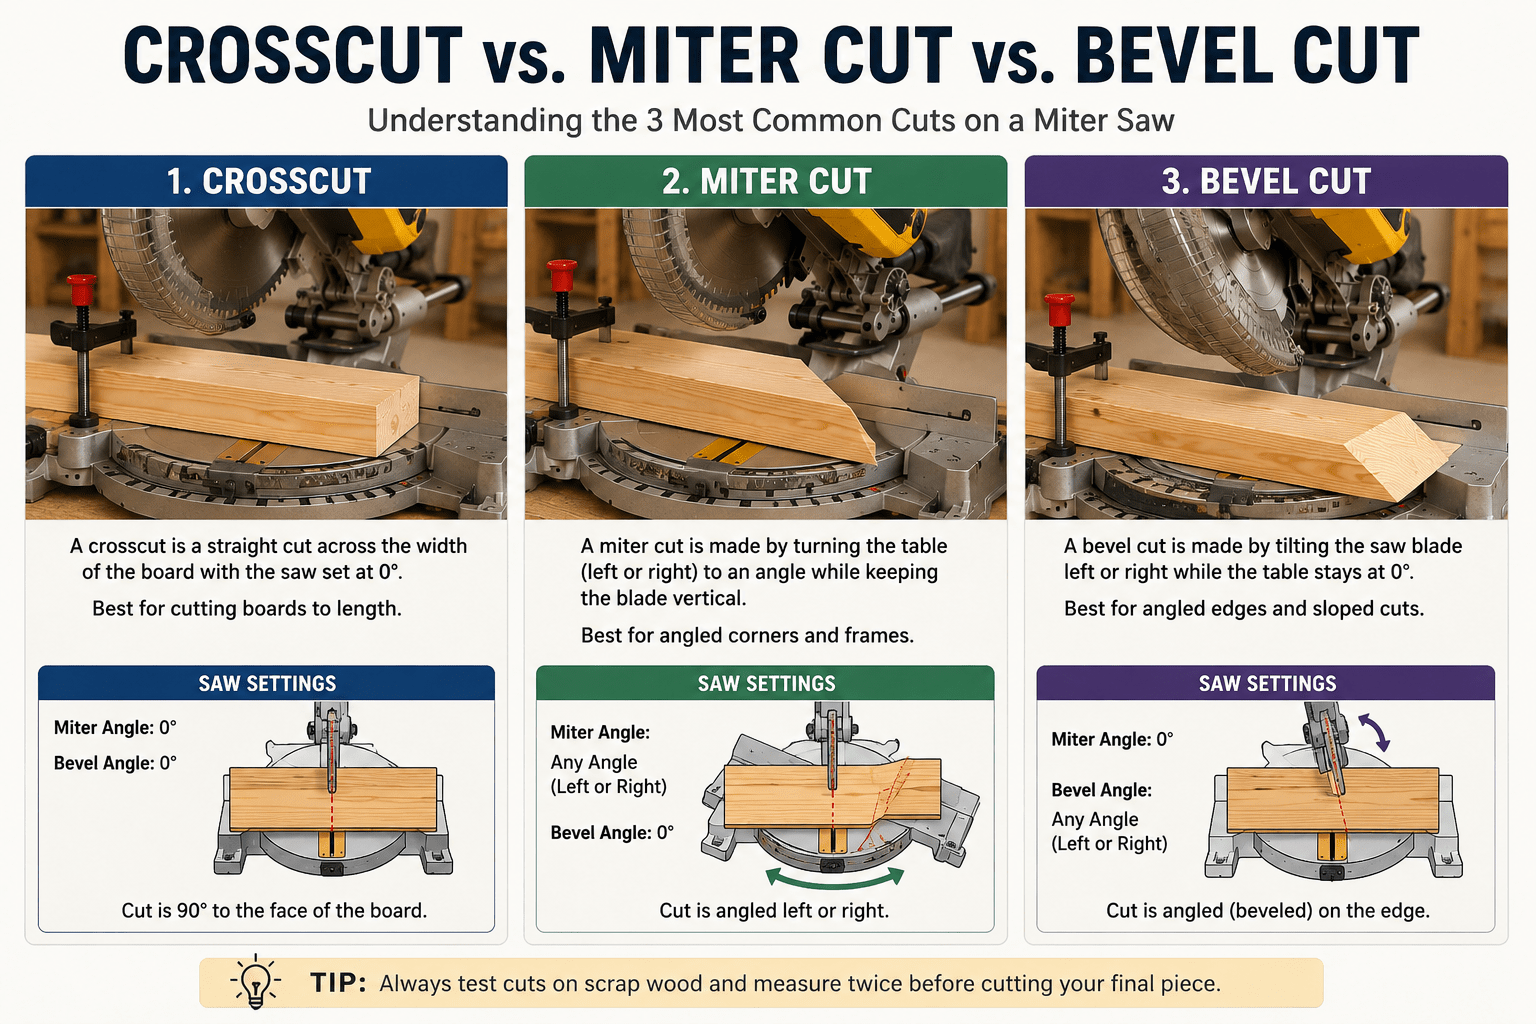
A crosscut is one of the most common cuts you will make with a miter saw. It cuts across the width of the board and is normally made at 90 degrees to the board’s length.
To make a basic crosscut:
- Set the miter angle to 0 degrees.
- Lock the miter adjustment.
- Place the board flat on the table and firmly against the fence.
- Align the blade with the waste side of your mark.
- Secure and support the workpiece.
- Start the saw and allow the blade to reach operating speed.
- Make a smooth, controlled cut.
- Allow the blade to stop according to the saw’s instructions before removing the workpiece.
If you need several pieces of exactly the same length, a properly arranged stop system can make repeat cuts much faster and more consistent. Make sure any stop or support arrangement is designed so cut pieces cannot become trapped against the blade.
How to Make a Miter Cut
A miter cut changes the horizontal angle of the cut across the board. A common example is cutting two pieces at 45 degrees so they meet at a 90-degree corner.
To make a miter cut, unlock the miter adjustment and rotate the saw table to the required angle. Many saws have positive stops at commonly used angles. Once the angle is selected, lock the table securely before cutting.
Do not assume two pieces cut at the same marked angle will automatically create a perfect joint. Wood movement, saw calibration, marking accuracy, and the actual angle of the project can all affect the fit.
If you are building a project that uses several joints, understanding how pieces fit together is just as important as making the individual cuts. Our guide to woodworking joints for beginners explains several common ways pieces of wood can be connected.
How to Make a Bevel Cut
A bevel cut is different from a miter cut. Instead of rotating the saw table horizontally, a bevel cut tilts the blade relative to the face of the board.
Depending on the saw, the cutting head may tilt in one direction or both directions. Always verify that the bevel adjustment is securely locked before starting the saw.
Bevel cuts are often used for trim, molding, decorative work, and projects where two pieces meet along angled faces.
Miter Cut vs. Bevel Cut vs. Compound Cut
These terms sound similar, but the difference becomes simple once you picture what the blade is doing.
- Crosscut: The blade cuts straight across the board.
- Miter cut: The saw rotates horizontally to cut across the board at an angle.
- Bevel cut: The blade tilts to cut through the thickness of the board at an angle.
- Compound cut: The saw uses both a miter angle and a bevel angle during the same cut.
Tips for Cleaner and More Accurate Miter Saw Cuts
Once you can operate the saw safely, a few simple habits can noticeably improve your results.
Use a Sharp, Appropriate Blade
A blade that is suitable for the material and type of cut can produce cleaner results than a damaged, dull, or inappropriate blade.
Mark the Waste Side
A saw blade removes a narrow strip of material called the kerf. Cutting on the wrong side of your mark can make the finished piece shorter than intended.
Put a small X on the waste side so you immediately know which portion of the board you are keeping.
Keep the Board Against the Fence
If the workpiece shifts while cutting, accuracy can suffer and the situation can become unsafe. Make sure the board is properly positioned and secured before starting the motor.
Do Not Rush the Blade
Forcing the saw through the material rarely improves the cut. Use a smooth, controlled movement and allow the blade to do its job.
Test Important Angles on Scrap Wood
If an angled joint must fit precisely, make test cuts on scrap material first. Small calibration errors are much cheaper to discover on scrap than on your finished project pieces.
Check the Saw’s Calibration
If repeated cuts are consistently out of square, do not automatically assume your measuring is the problem. Check the saw according to the manufacturer’s calibration procedure.
Common Beginner Miter Saw Mistakes
Most early miter saw problems are not caused by complicated woodworking. They come from skipping simple setup steps.
Cutting Before the Board Is Stable
A workpiece that rocks, twists, or is poorly supported can move during the cut. Take time to position and support it correctly.
Ignoring the Blade Kerf
Cutting directly through the center of a pencil line can change the finished dimension. Decide which side is waste and position the blade accordingly.
Holding the Workpiece Too Close to the Blade
Do not sacrifice hand safety for convenience. If the piece cannot be held or clamped safely while your hands remain outside the hazardous area, change the setup rather than attempting the cut.
Raising the Saw Too Quickly
Maintain control of the cutting head and follow the manufacturer’s instructions regarding blade stopping and head movement after a cut.
Trying to Cut Material the Saw Is Not Designed For
Blade size, blade type, motor design, and saw capacity all limit what a particular miter saw can safely cut. Check the manufacturer’s specifications before cutting unfamiliar materials or unusually large stock.
Forgetting to Support Long Boards
Long lumber hanging unsupported off one side of the saw can make accurate positioning difficult. Use suitable supports that keep the workpiece level with the saw table.
Miter Saw Safety Tips Every Beginner Should Follow
Good miter saw habits should become automatic. Manufacturer safety instructions emphasize keeping hands away from the blade path, securing the workpiece, and maintaining control of the saw throughout the cut. Bosch, for example, specifically warns users to keep hands at a safe distance from the blade and not to cross hands into the blade path, while Makita instructs users to secure the workpiece firmly against the saw base and fence rather than attempting unsafe freehand cutting.
- Read the manual for your specific saw before operating it.
- Wear eye protection and suitable hearing protection.
- Keep hands well away from the blade and blade path.
- Never reach across or behind a moving blade.
- Keep guards and safety devices functioning properly.
- Support long workpieces adequately.
- Secure the workpiece before cutting.
- Never try to hold a piece that is too small to secure safely.
- Keep the work area clear of loose scraps and tools.
- Disconnect power before blade changes and appropriate maintenance procedures.
- Use only blades and accessories approved for your saw and application.
- Wait for the appropriate stopping sequence before handling cut pieces.
The goal is to build a routine in which every cut begins with the workpiece stable, the blade path clear, and your hands already positioned safely.
Miter Saw vs. Circular Saw vs. Jigsaw
A miter saw is useful, but it is not the best saw for every woodworking task.
Miter Saw
Choose a miter saw when you want repeatable crosscuts, accurate angled cuts, trim work, or multiple boards cut to consistent lengths.
Circular Saw
A circular saw is portable and can cut material that would be awkward or impossible to place on a miter saw. It is especially useful for breaking down larger boards and sheet goods.
If you are learning that tool next, see our complete guide on how to use a circular saw for beginners.
Jigsaw
A jigsaw is a better choice when the project requires curves, irregular shapes, cutouts, or tighter maneuverability.
Our beginner’s guide to using a jigsaw explains how to make safer, cleaner curved cuts and choose a suitable blade for the task.
Many beginner workshops eventually include all three tools because each solves a different cutting problem.
What Can You Build After Learning to Use a Miter Saw?
Learning accurate crosscuts and angled cuts opens the door to many beginner woodworking projects. Depending on your tools and experience, a miter saw can help prepare parts for shelves, small tables, planter boxes, simple frames, benches, storage projects, and other builds that use dimensional lumber.
Before starting a project, review the plans carefully so you know the finished dimensions, required materials, cutting sequence, and joinery before you begin cutting expensive lumber.
Ready to put your new cutting skills to work? Explore beginner-friendly woodworking plans and project ideas here.
Beginner Miter Saw FAQ
Can a Beginner Use a Miter Saw?
Yes. A miter saw can be approachable for a beginner when the user has read the manufacturer’s instructions, understands the saw’s controls and safety features, and practices proper workpiece positioning and hand placement. Beginners should start with straightforward cuts on manageable pieces rather than complicated compound cuts.
What Should You Never Do With a Miter Saw?
Never place your hands in the blade path, bypass guards or safety devices, attempt to control an unsafe workpiece with your hand, make adjustments that require power disconnection while the saw remains energized, or use the saw outside the capabilities described by its manufacturer.
Do You Push or Pull a Miter Saw?
It depends on the saw design. A standard non-sliding miter saw generally pivots downward through the workpiece. A sliding miter saw adds horizontal travel, and the correct cutting sequence depends on the specific design. Follow your saw manufacturer’s operating instructions rather than applying one technique to every sliding saw.
Why Is My Miter Saw Cutting Crooked?
Possible causes include a workpiece that is not seated firmly against the fence, inaccurate marking, a shifting board, an unsuitable or damaged blade, or a saw that needs calibration. Check the simplest setup issues first before making mechanical adjustments.
What Type of Wood Can a Miter Saw Cut?
A miter saw can cut many common woodworking boards when the material dimensions, blade, and saw capacity are appropriate. Always check your particular saw and blade specifications before attempting unfamiliar materials.
Is a Miter Saw Better Than a Circular Saw?
Neither tool is universally better. A miter saw excels at controlled crosscuts and repeatable angles, while a circular saw is more portable and can handle large material that cannot conveniently be placed on a miter saw. The better tool depends on the cut you need to make.
Final Thoughts
Learning how to use a miter saw for beginners is mostly about developing a dependable routine. Set up the saw securely, inspect your equipment, measure carefully, support the workpiece, keep your hands away from the blade path, and make every cut with a controlled motion.
Start with simple crosscuts until positioning the board and operating the saw feels familiar. Then practice miter and bevel cuts on scrap wood before using them in finished projects.
Accuracy improves with repetition, but safety should never depend on experience. Treat every cut as a fresh setup and confirm that the workpiece, saw, and your hands are all where they belong before starting the blade.
If you are ready to turn those skills into finished projects, browse the woodworking plans and project ideas available through DIY Home Project Guide.
Disclosure: DIY Home Project Guide may earn a commission from qualifying purchases or offers reached through links on this site, at no additional cost to you.

